Hello all!
I am finally back at it with finishing my sunroom! Ahhh it feels good. It was supposed to be completely finished in November, but of course time got away from me. Sometimes these challenges, like the One Room Challenge I had originally followed along with, are great because they push you to get finished. I’m not trying to make excuses, but sometimes life intrudes on your plans – and that’s OK! When the challenge started back in October I was about 6 weeks pregnant and extremely fatigued! I started off the challenge strong, but as our boutique got busier with getting ready for Christmas, a vendor show, as well as custom furniture pieces we got behind on, my personal projects got put wwaaayyyyy on the back burner.
So here we are again, back to my sunroom that will get 95% finished before the Holidays! And be ready – I’m hoping to get these last few posts out quickly!
If you haven’t seen the previous posts on the sunroom (or just plain forgot because it’s been awhile!) here are the first few weeks of my Sunroom makeover:
Sunroom Plan / Multi-Drawer Cabinet Makeover / Painting the Sunroom
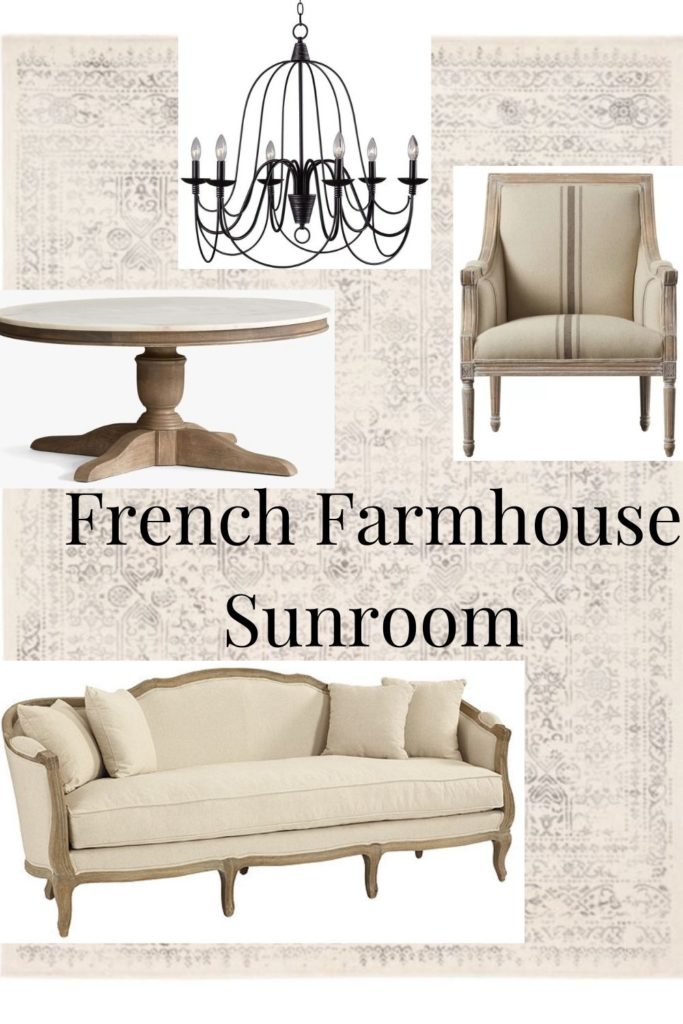
We were able to get all the walls painted a new color, FINALLY finished up a really old multi-drawer stand that I have meant to refinish for about 2 years. I received my couch and love seat, got a new rug, and randomly found two other sitting chairs at a quick stop to Home Goods. (That was a lucky one!) It is looking like it’s coming together nicely, but I still had some large projects to finish. I needed a substantial piece for one corner of the sunroom and came up with the idea of using a hutch top and found my inspiration color in a post I wrote last week. This Ash Gray Buffet we painted totally inspired me for the piece I wanted in my sunroom. See that HERE.
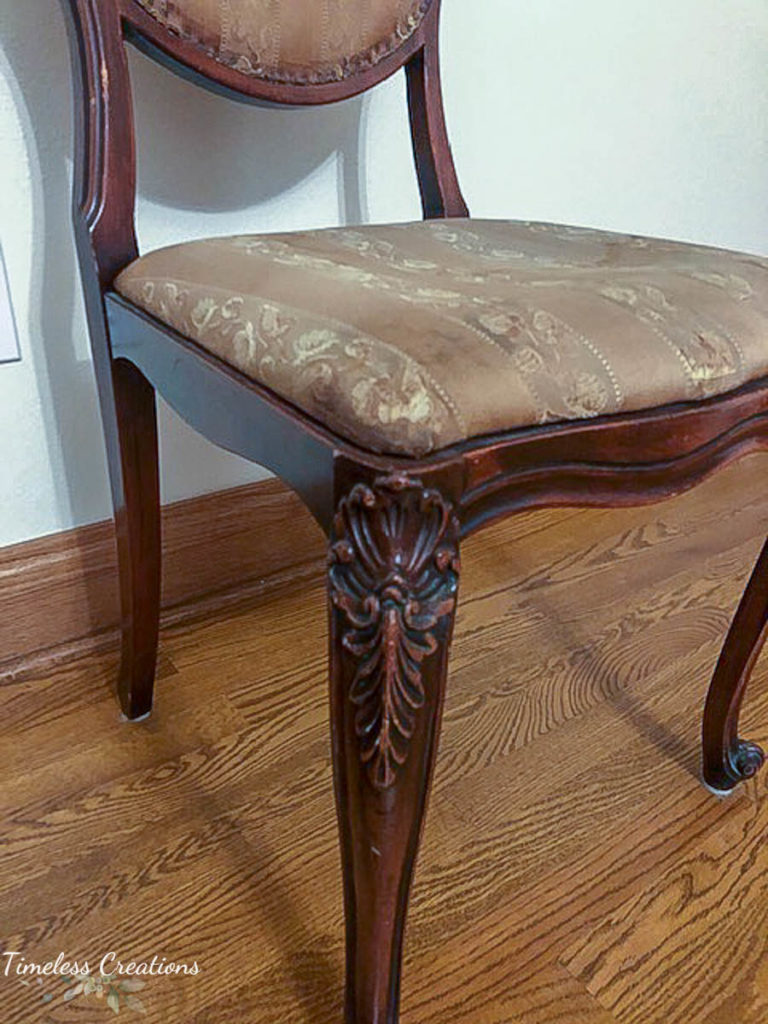
I also had two chairs to paint and reupholster. One was a small desk chair that was pretty beat up. I found it at a local consignment store for $5! It was very sturdy and had some great ornate details to it, but the old fabric was just terrible. Needless to say it needed a great makeover in order to fit in in my sunroom.
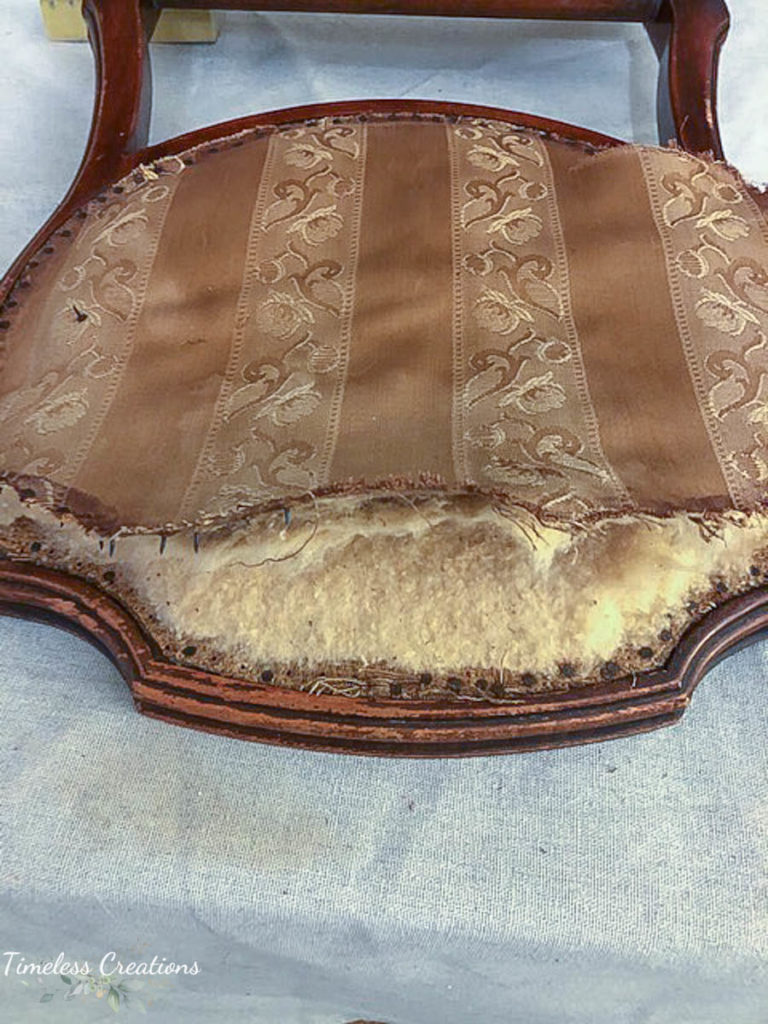
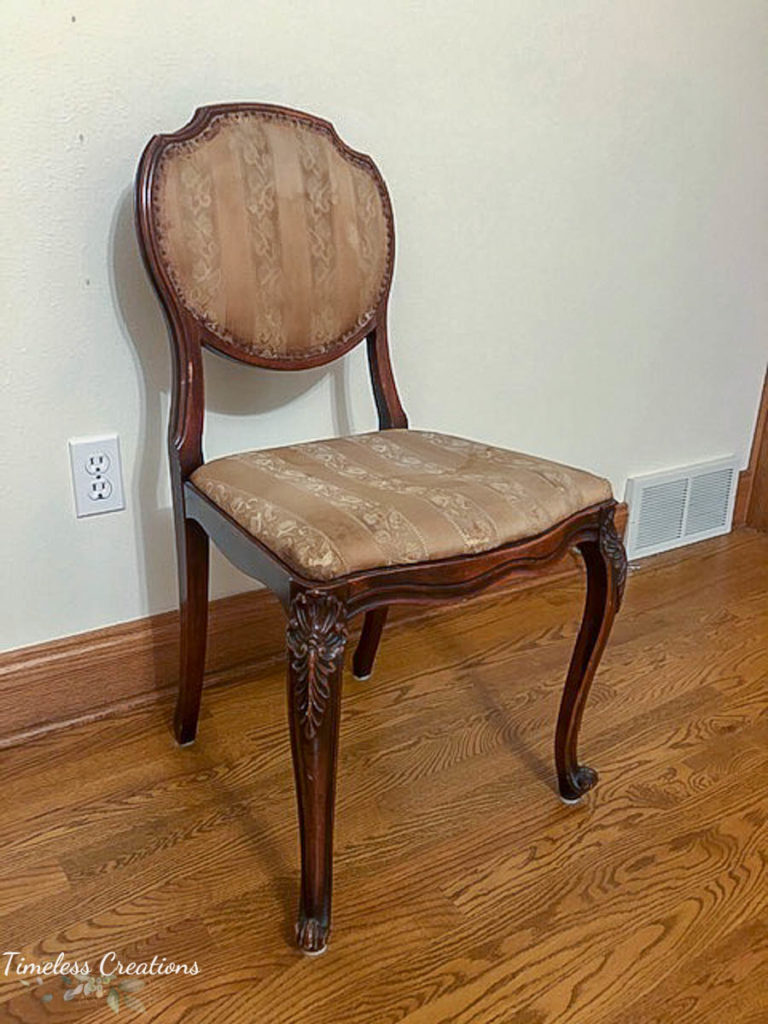
Here is what it looked like before:
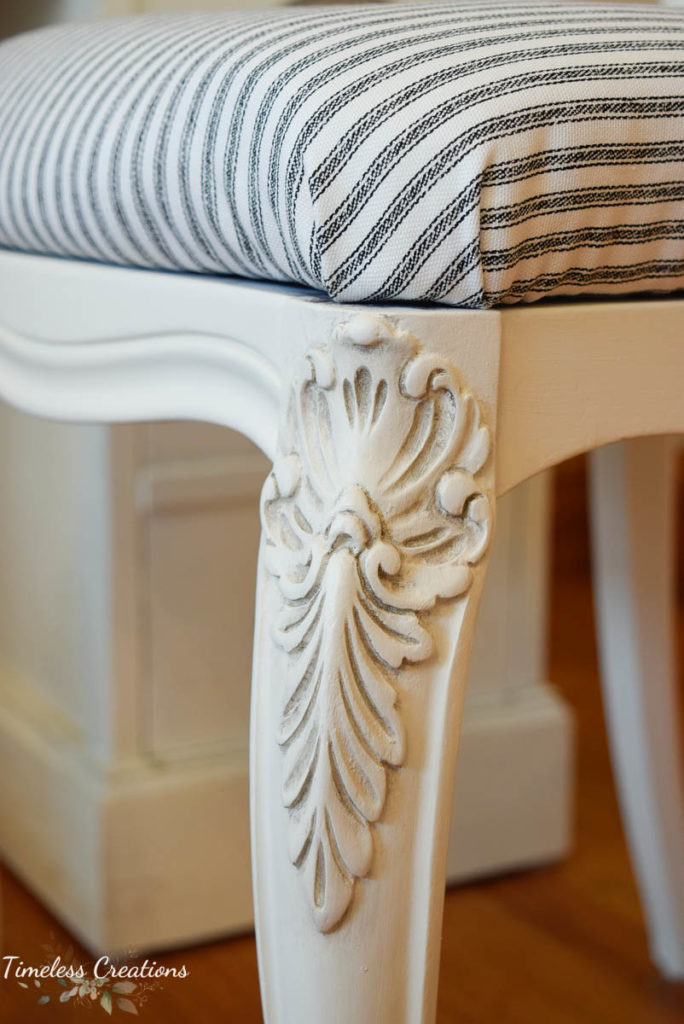
Ugh – see that fabric was not only old and worn but horribly stained. BUT – just look at the fun details on the legs and the curved feet. Vicki and I both LOVE detailed pieces like this. If you have never done any upholstery these kind of chairs – or better yet chairs that only have a seat to reupholster are the best types to start on. I have some key tips and tools to help you in your own upholstery projects. There is no sewing, just need those tools to help make it easier.
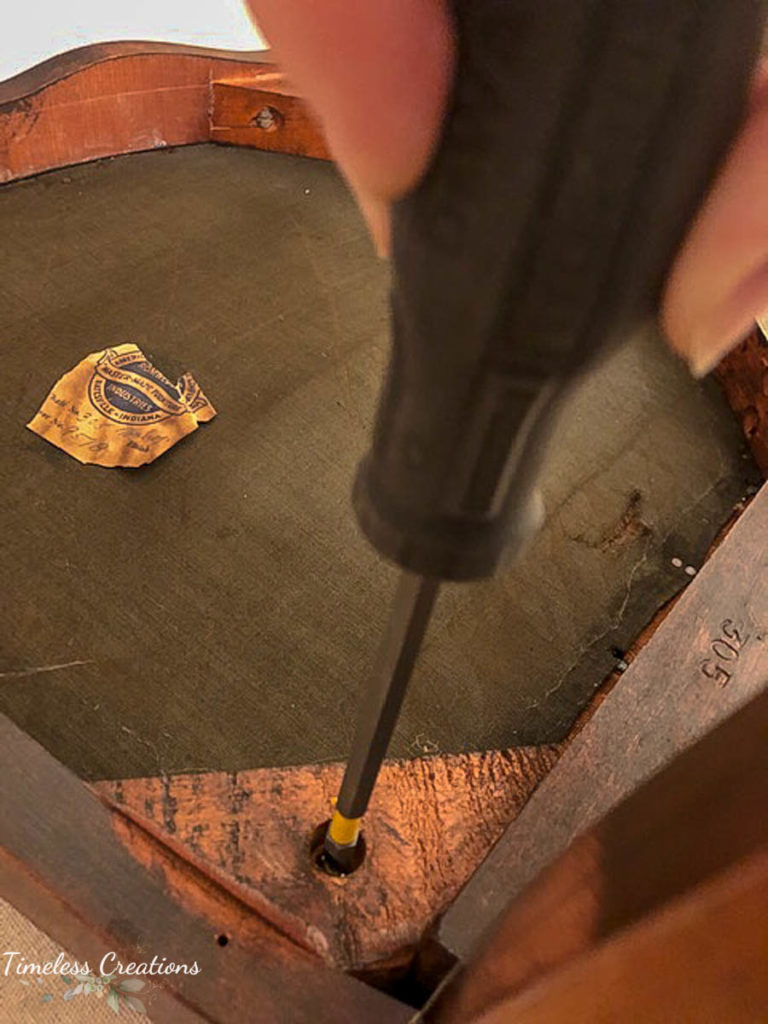
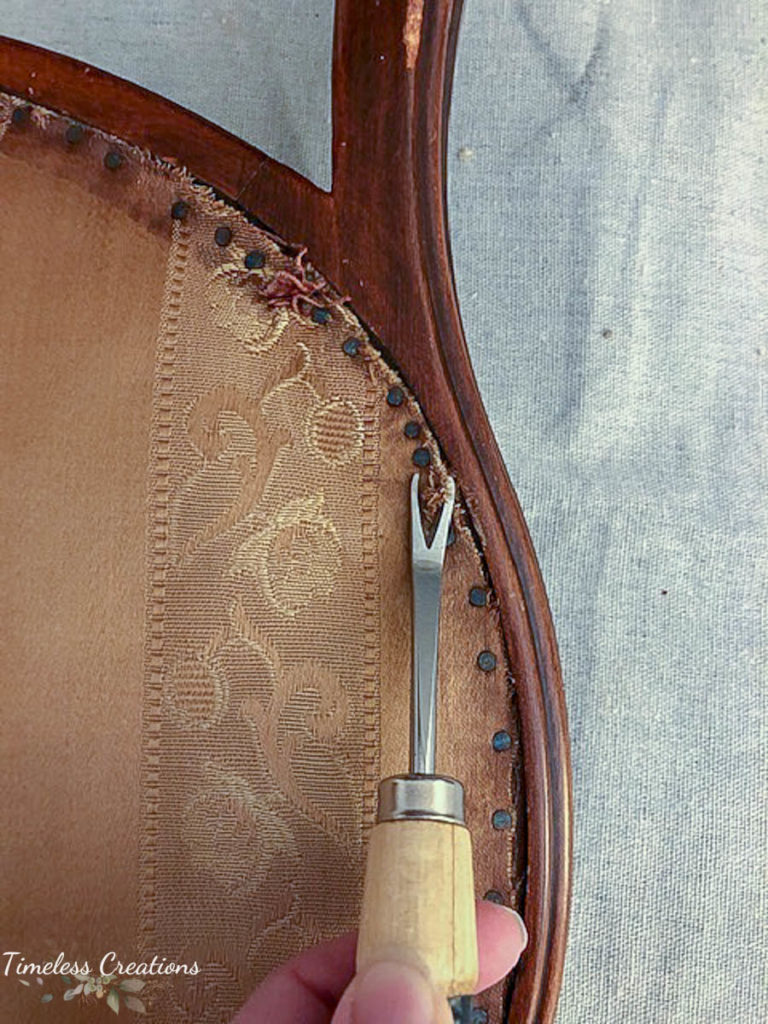
The first step is to take your chair apart. Most pieces have seats that easily unscrew from underneath. Take the seat completely off and begin taking the old fabric off. This chair was so old that it had tacks holding the fabric in instead of staples! I find that neat, and luckily they were fairly easy to take out. The first key tool is to get yourself an upholstery tack and staple remover. We have one that is similar to THIS. It makes your life so much easier to just use a good tool like this! For removing staples you may want to have a needle nose pliers on hand as well just in case a staple breaks. Remove all staples or tacks holding the fabric on.
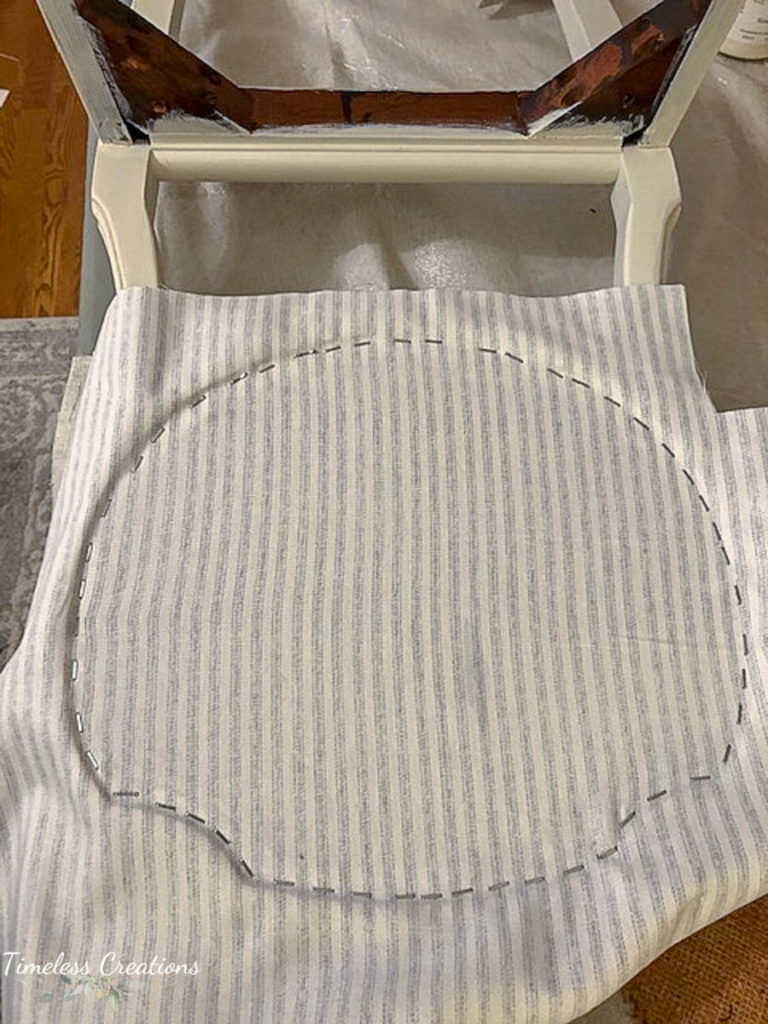
This next part is a key tip for upholstery! Keep your old fabric to later use as a template in cutting out your new fabric. Label your pieces if you have multiple. For this chair, once I removed all of the fabric, there was super old stuffing in it that just needed to be completely thrown out. I got rid of all the old and got the chair seat all the way down to the bare wood frame. Do this same removal of old fabric anywhere else you may have it.
For my chair, there was fabric on the back as well. I removed all of that first fabric and took out all the old batting. Here is where you may have to pay attention to how your chair is upholstered. For my chair it shows the fabric from the back but it is actually attached in the front instead of the entire back bar of the chair being covered by fabric. It was easy to see how it was done while I was taking it apart, but if you are new at upholstery, just jot down some quick notes, or better yet, take some photos to help you remember later.
Once all the tacks were removed I cleaned and scuff sanded the wood on the chair frame and then primed my chair with Zinsser BIN primer with Shellac. I don’t normally find the need to prime, however, I could tell this chair frame was mahogany which is notorious for bleeding through paint. A quick coat, or possibly two if you find a lot of bleeding, will suffice. In order to cover any bleed through you must have the primer with Shellac! It’s very important. We like to use the “synthetic shellac” because it can be cleaned with soap and water instead of mineral spirits.
After the primer I followed with 2 coats of my favorite off-white color, “Raw Silk” by Fusion Mineral Paint. After waiting overnight I came back the next day to add some wax to the details of the chair. Adding wax over Fusion is super easy. I took a nice natural bristle brush and just brushed and “smooshed” the “Ageing Wax” into the details. I then was able to immediately wipe off the wax on the parts around the details where I didn’t want the wax, as well as the high parts of the details. This left the wax in the lower areas, really accentuating them.
Then it was back to the upholstery part. I did the seat first which was easy. I built it back up with new webbing, 2″ foam, and batting. Taking my template from the seat, I cut out the new fabric just a little larger than the original so I would have plenty to work with. Next key tool comes into play here! Get yourself a good stapler. We have THIS one that works with a compressor which is by far the easiest. You can use an electric stapler but we have found those to be harder to work with.
The seat bottom was very straightforward as you just follow the outline of the chair. We do each side up to the corner and then work on the corners last. For my chair it was an easy fold-over technique to staple them back, just make sure your corners look similar to each other.
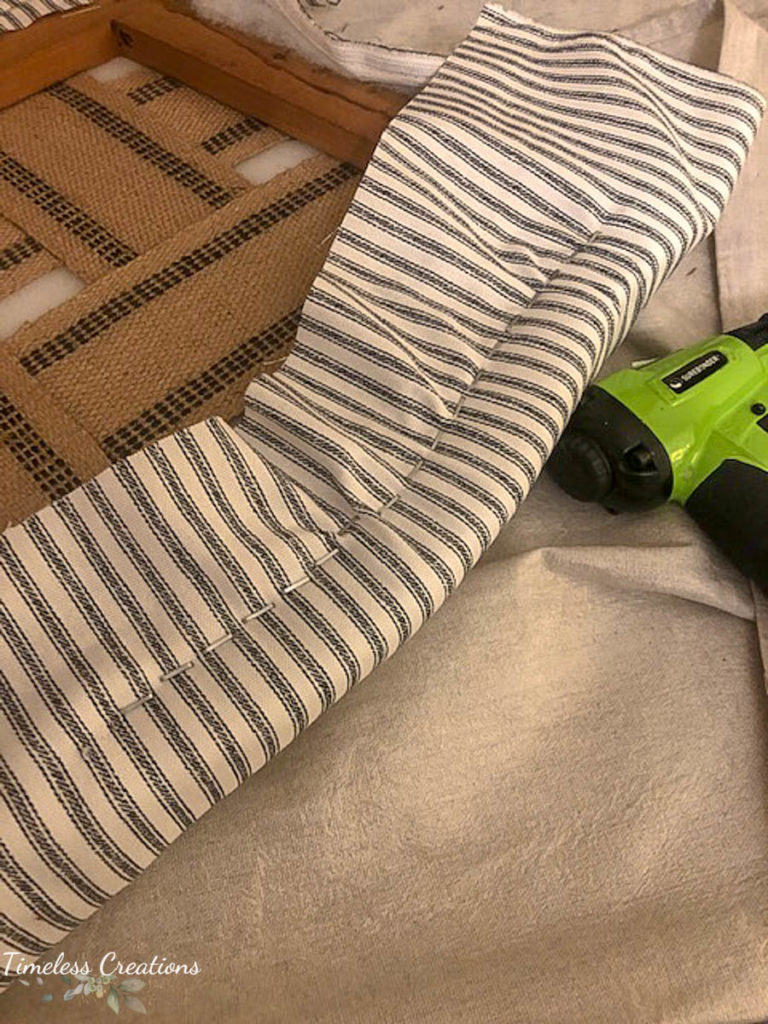
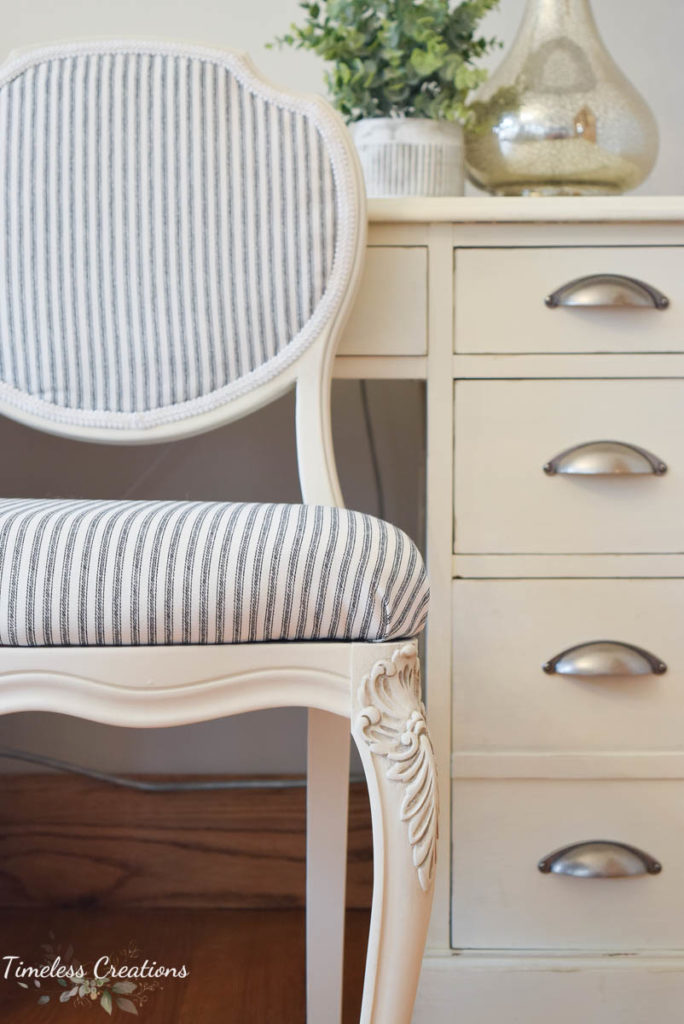
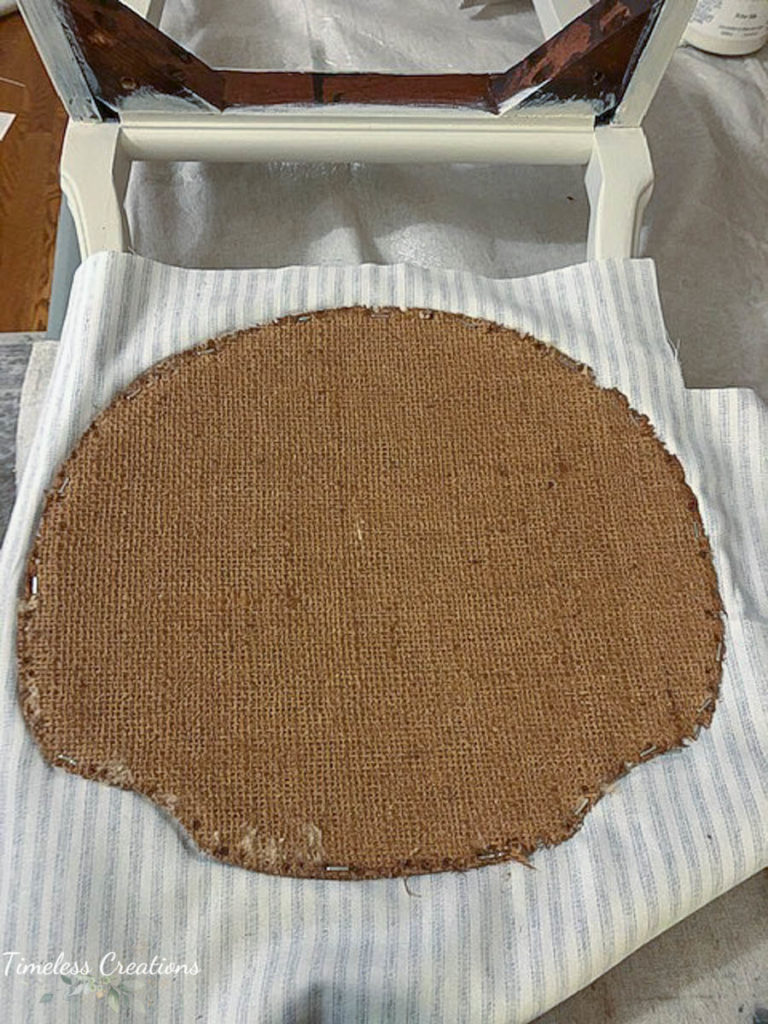
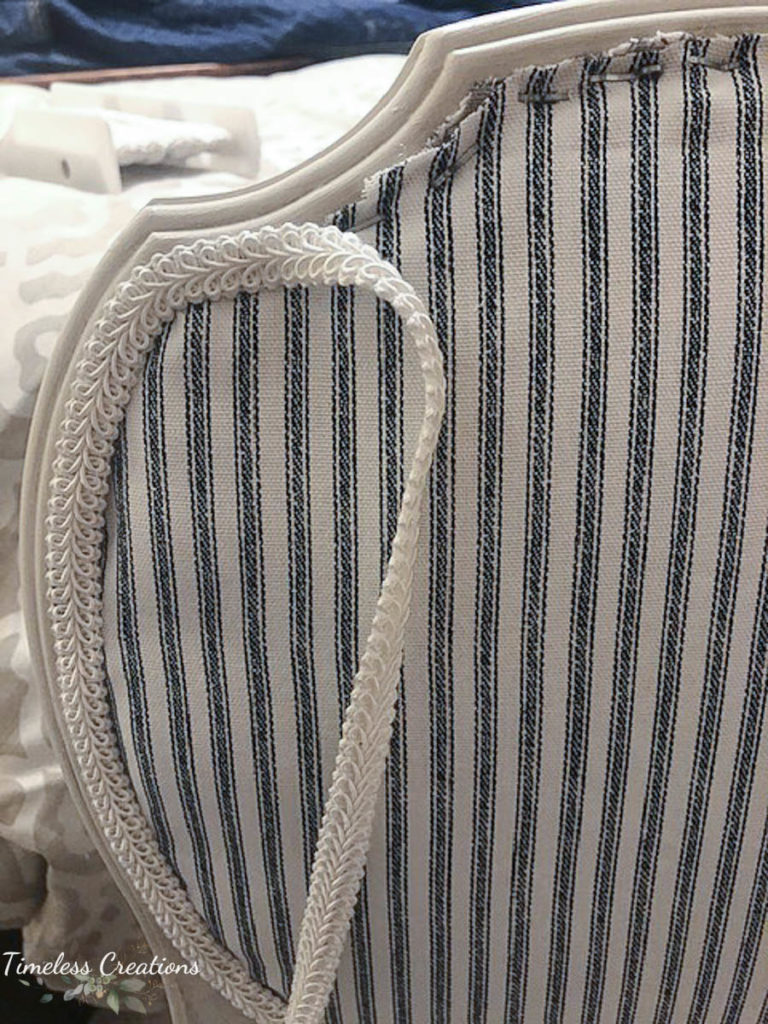
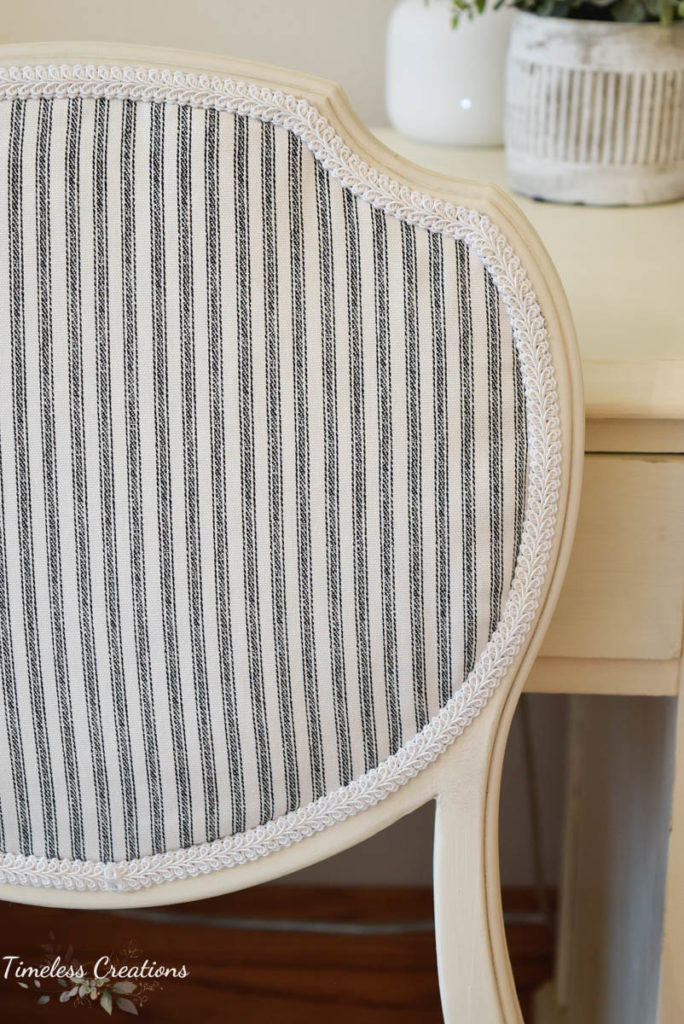
On to the upholstery of the back piece, I first had to cut fabric that will be facing out towards the back of the chair. A quick staple around the frame was easy. I then put the stiff weaved board that came in the chair back in to keep the back fabric taut (this is where your notes on how it came apart would come in handy). A little bit of stuffing and some batting as fill I was then able to apply the front fabric, easily just stapling it all around the framework. There is usually a little groove or frame on where to follow around. Once it is all stapled you can trim any excess with a scissors. And to finish it off I just glued on some braided trim to cover up the rough edge and staples! Easy!
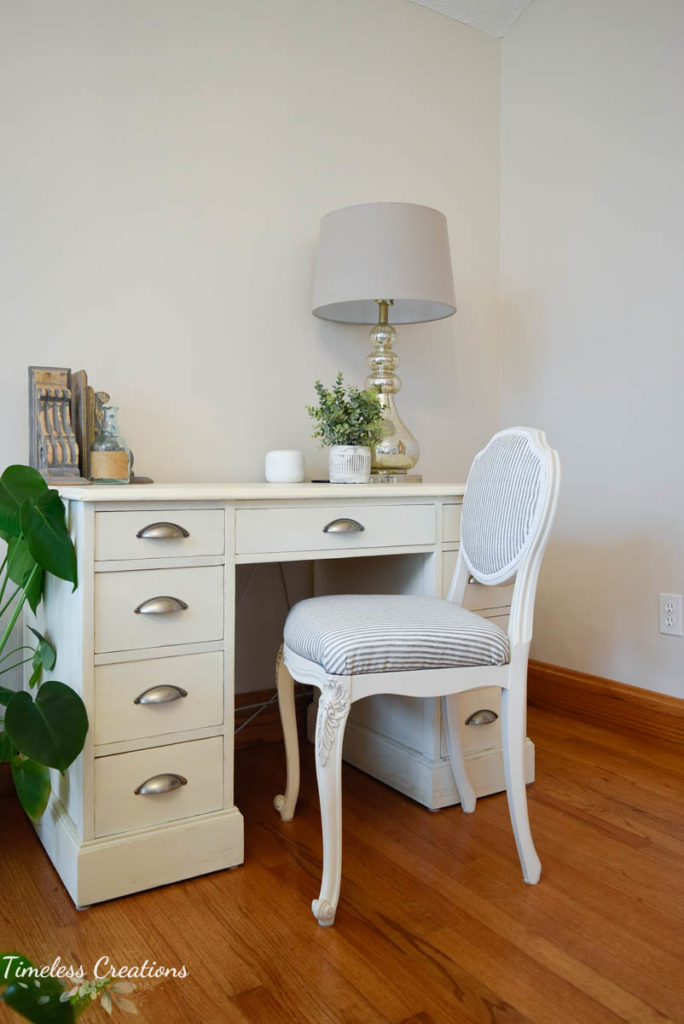
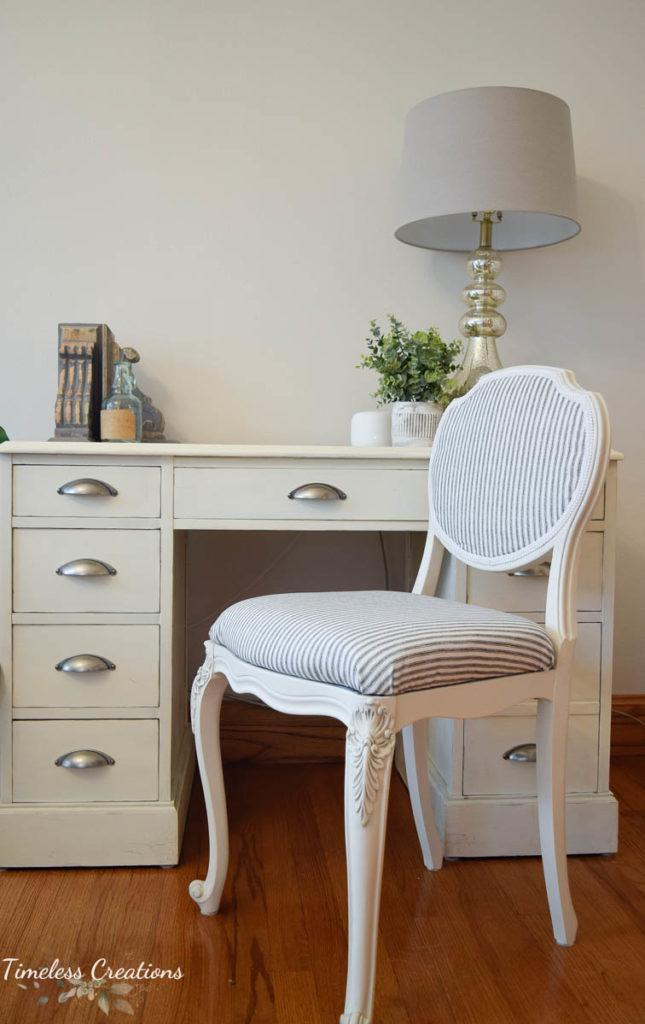
And you can just see how beautiful my desk chair now looks! A complete transformation from old and dingy to bright and new.
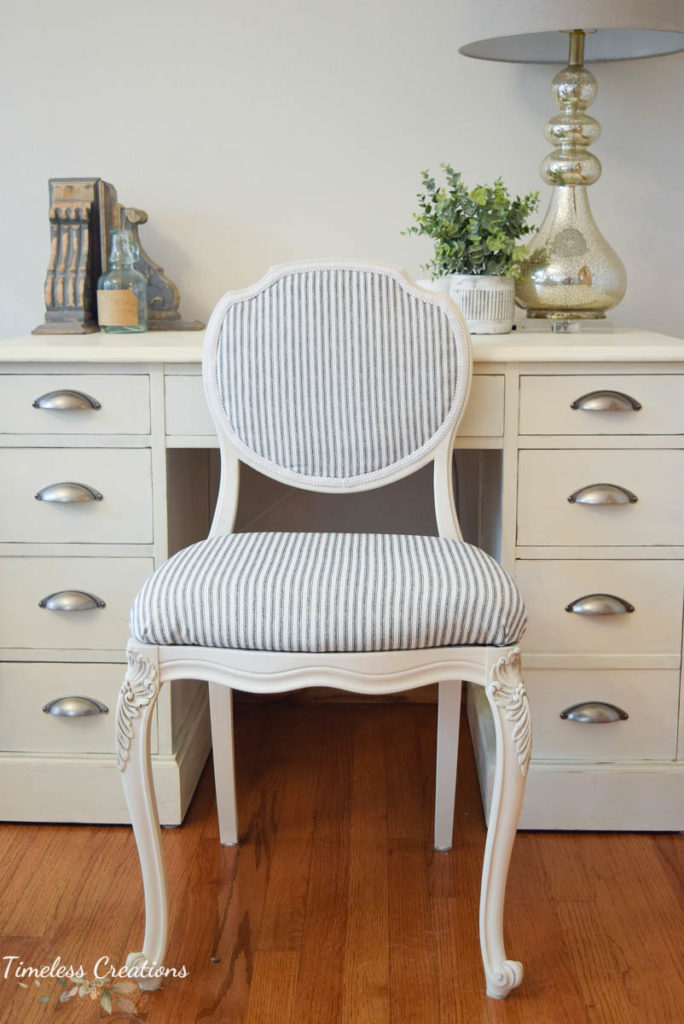
Originally this desk was put in the sunroom only as a temporary solution for working at home, but we found that my husband actually used it a lot and loves to sit in this room. There was plenty of space to tuck it to one side of the room and just decorate nicely around it. (Which I still need to do…) It has plenty of drawers to store office supplies inside that none will be left out on top. We have a printer in a separate room since we don’t use it very much at all. It’s not necessarily a dedicated office space, but is easily used by my husband for Zoom meetings, finishing charts, or sending out emails!
I will definitely be adding a couple decor items to the walls around this desk, I even have some in mind, but have not got to the decorating part of the room quite yet. It’s actually quite messy with all of the Christmas decorations waiting to be put out! I set aside certain items I knew would be perfect in this room for the holidays and can’t wait to get it all finished up.
I have my hutch piece that I mentioned earlier already started, it just needs the shelves painted and put back together. I’m hoping to post that one VERY soon and then just a bit later will reveal the whole room. It’s going to come very quickly, within days of each other as I am running out of time to get this finished before Christmas!
The only thing I am NOT going to get finished is the second chair that needs updating. It is a larger and more complicated Bergere style chair that needs to be painted, new padding inside and of course new fabric. I have just accepted the fact that it’s not going to get finished right away. I am going to need help with that one, so we will need to find time for both Vicki and I to do the upholstery which isn’t going to happen before Christmas!
No worries though, I know it will happen eventually! Alright, stay tuned friends as I bombard you all with Sunroom posts in quick succession over the next few days!



Leave a Reply