Hello again!
We have a really great project to share with you all today, how to add dimension with Fusion’s Stain and Finishing Oil. We have been experimenting with Fusion Mineral Paint’s stain and finishing oil a bit on a couple different pieces of furniture lately to really get a feel for the different products. Not only is Fusion’s paint amazing, but their additional products (cleaner, accents, and speciality finishes) are some of the best. We have been able to create some really fun looks using this line of products we carry in our store and on our website.
The project we did was this sorry looking antique buffet we picked up quite a few years ago. Again, all the pieces we acquire have fabulous bones, they just need a little help. This piece was mainly veneer issues and some scratches and dings – which comes up quite often in old pieces.
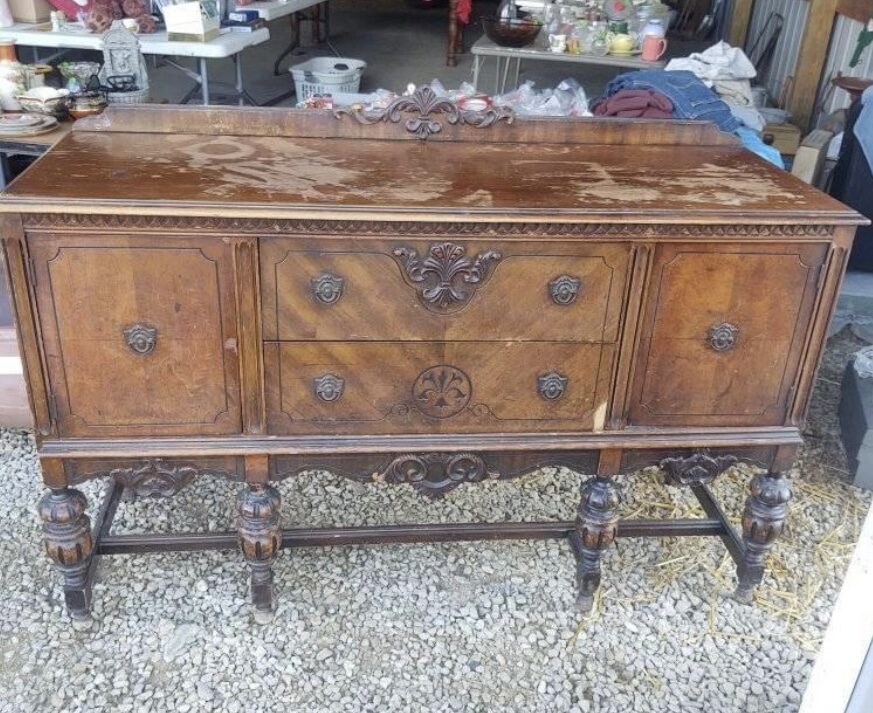
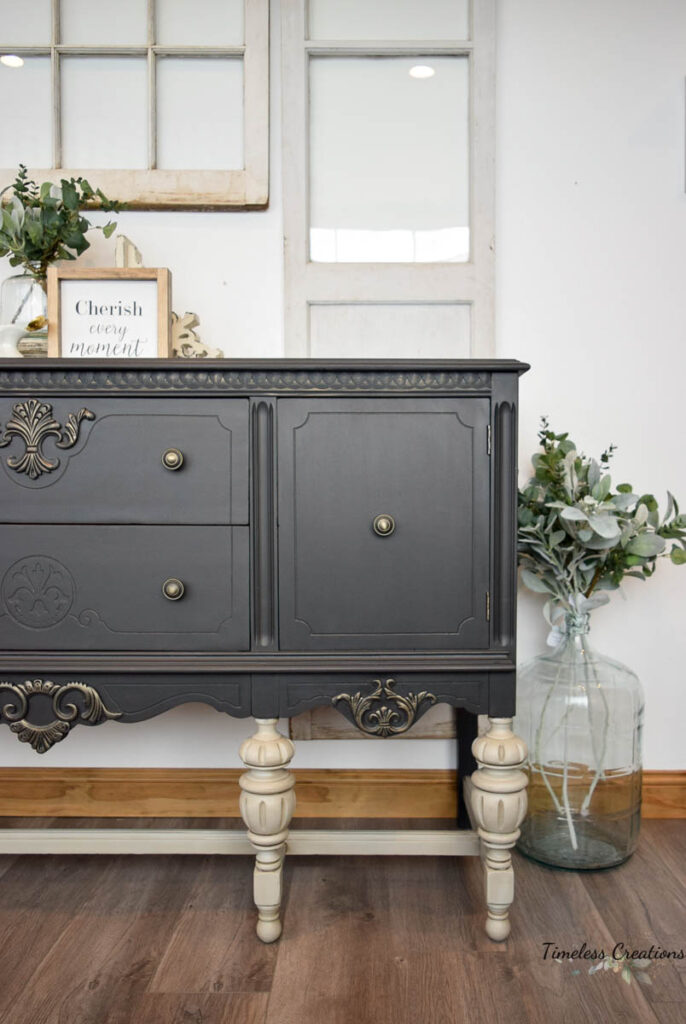
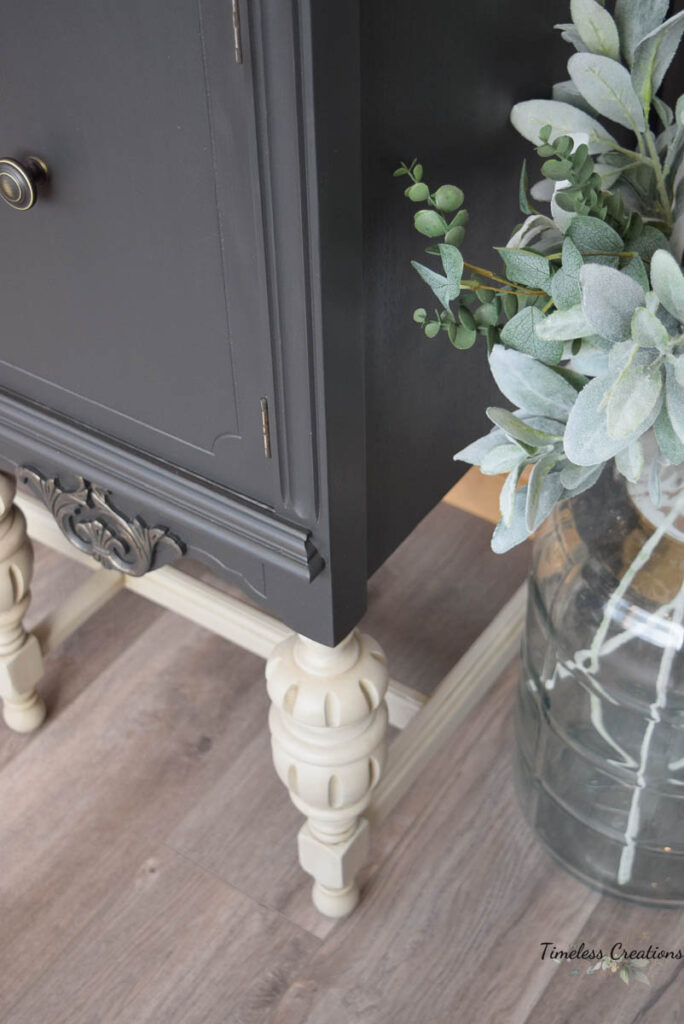
After all of the repairs and much needed sanding, we then decided on a lovely color for this piece. I would say choosing the color can be really difficult! For this one I decided on a two tone look as I wanted to do something extra special with the feet. I originally thought about keeping the feet raw or stained, but they ended up having some extensive repairs that I didn’t like that idea. So instead I decided to do a faux look with paint and Fusion’s Stain and Finishing Oil.
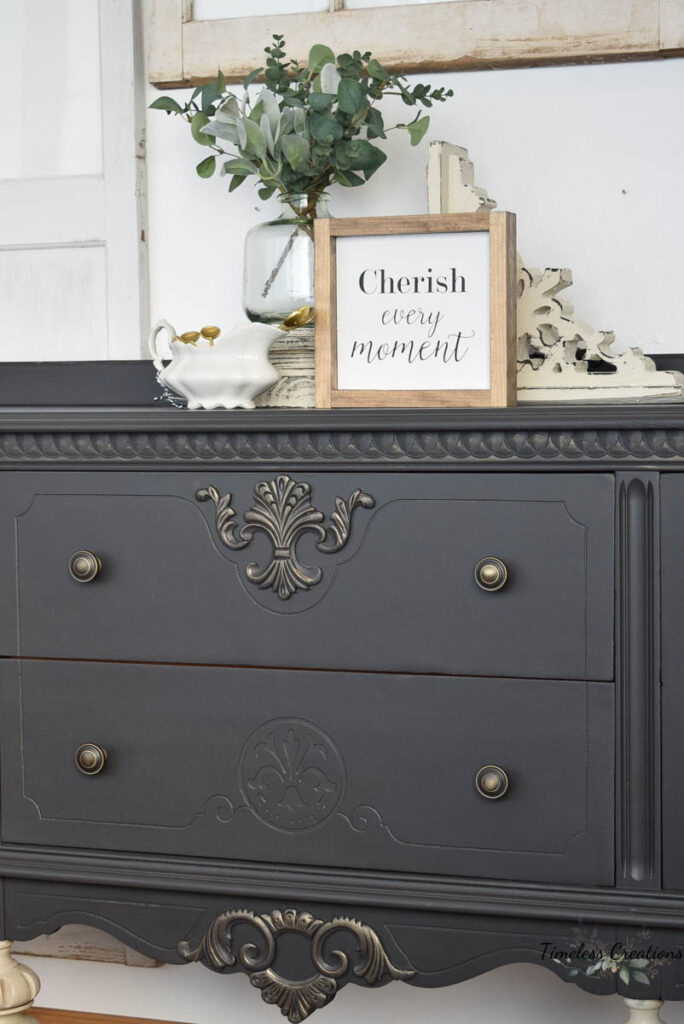
I first painted the body of the piece in the color I choose called “Cast Iron”. A beautiful off-black color, not the deepest true black but still deeper than “Ash” which looks more gray. Cast Iron is a newer Fusion color and I was dying to try it! After painting the body I did some sample boards to decide exactly what colors I wanted to pair for the faux look on the legs. I tried a couple different base paint colors, trying different light gray colors from the Fusion line as well as some “greige” tones as well. After the samples dried, I tried the Stain & Finishing oil in two different colors “Driftwood” and “Cappuccino” over the base paint samples to see how they looked.
I decided on a base coat of “Pebble” paint with the “Cappuccino” Stain & Finishing Oil over the top of the paint. The “Cappuccino” stain over the gray tone of pebble helped to warm up the gray paint to better suit the warm tones of the top part painted in “Cast Iron”. Creating a sample board and being able to play around with different tones of paint and special finishes is really key to creating new looks. We always recommend painting up a sample board if you just aren’t sure between 2 different colors or looks!
Now on to the tutorial on how to use Stain and Finishing oil over a painted surface.
It’s easy really! Begin by painting out your surface with your base coat of paint. Again, for these legs I used the color “Pebble”. This color covered pretty well with just one coat, but I always prefer two coats just to be sure I don’t miss any spots or have thin spots.
Then after the paint has dried (I would suggest for at least 24 hours) you can begin with the Stain & Finishing Oil.
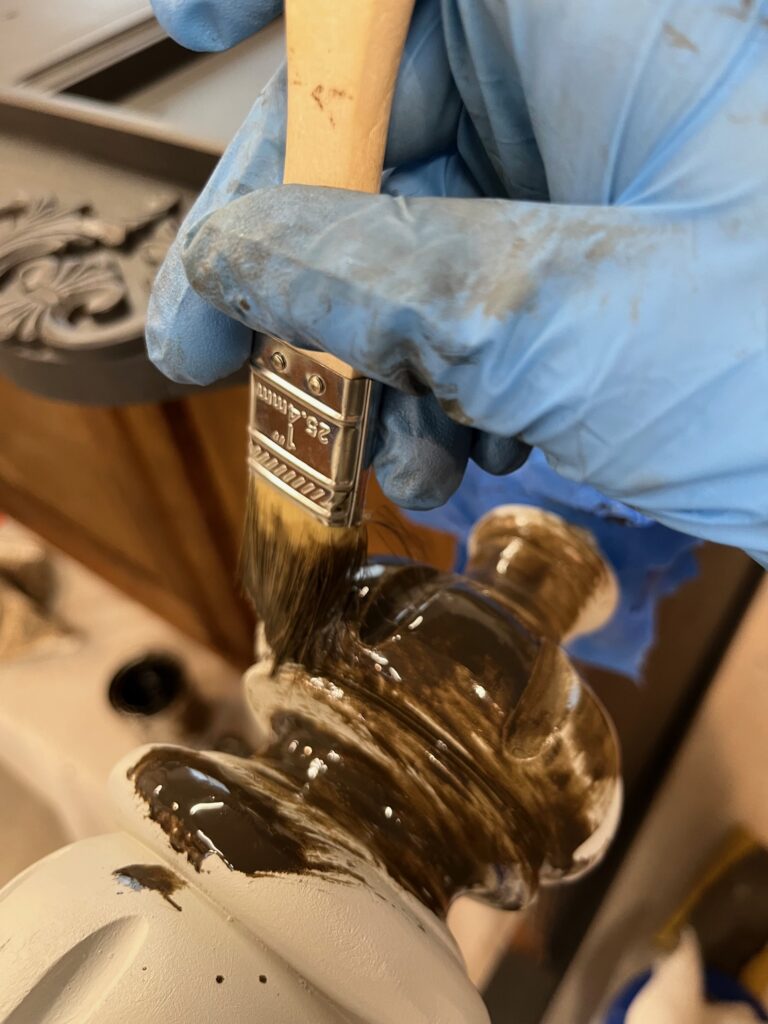
If you have ever glazed a piece before this is essentially the same thing. After the base coat of paint completely dried I took a cheap chip brush and painted the stain over the entire leg. It doesn’t take much of the product to make an impact. I worked on one leg at a time, brushing the stain on and then immediately wiping it off with a rag.
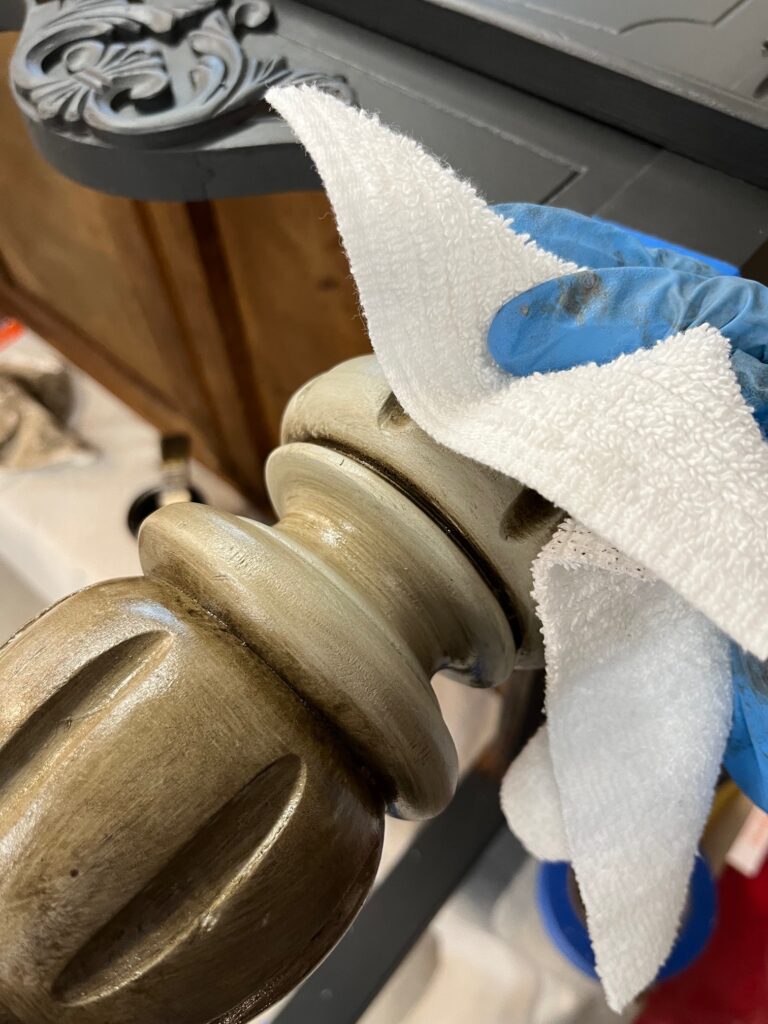
You can wipe back as much as you need to and take even more off with a damp rag if you needed more off as well. Just be careful not to use too terribly much pressure to ensure no paint rubs off.
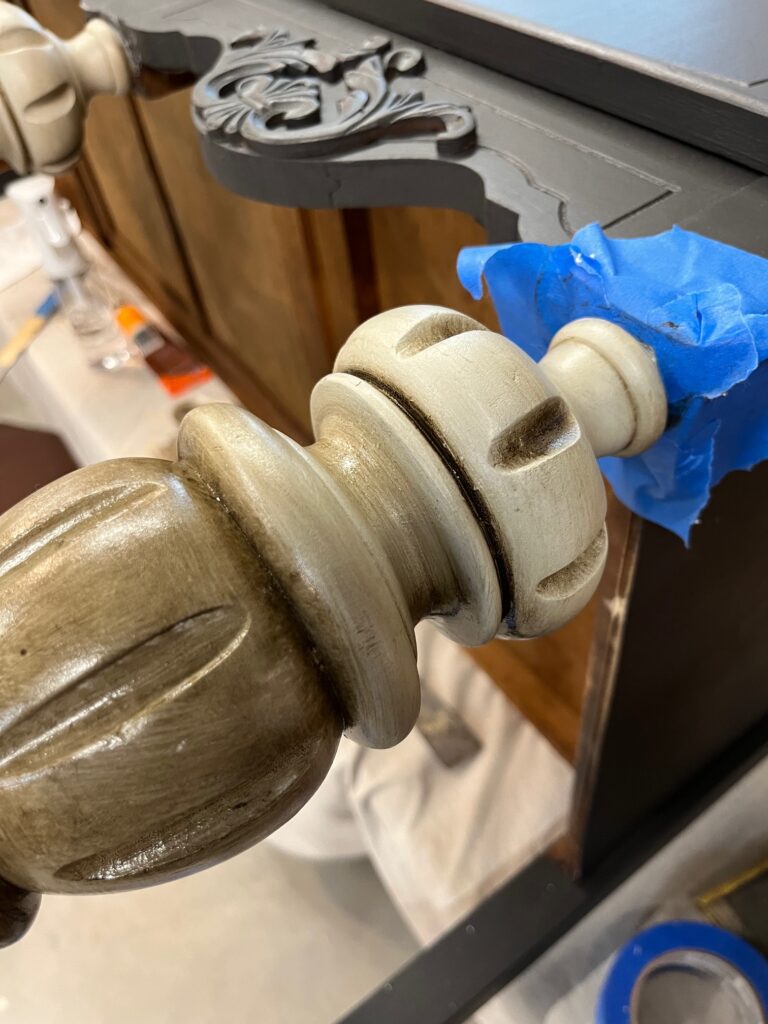
In the photo above you can see the difference between the wiped back portion and the stain. I did leave the stain in most of the crevices of the beautiful turned legs so it would bring out those details to the fullest.
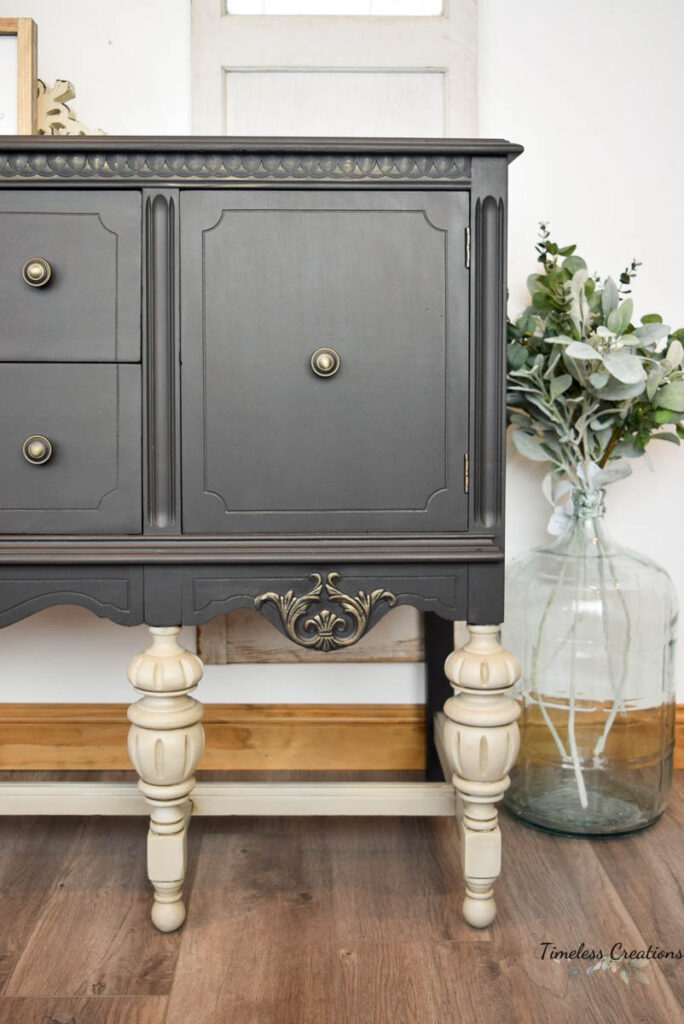
Fusion’s Stain and Finishing Oil comes in multiple different colors – White, Natural, Ebony, Driftwood and Cappuccino. For this piece I actually used the color “Cappuccino” as it is the brown in the family. I wanted to play on the warmness of the “Cast Iron” and thought that color worked beautifully from what I tried over my sample boards.
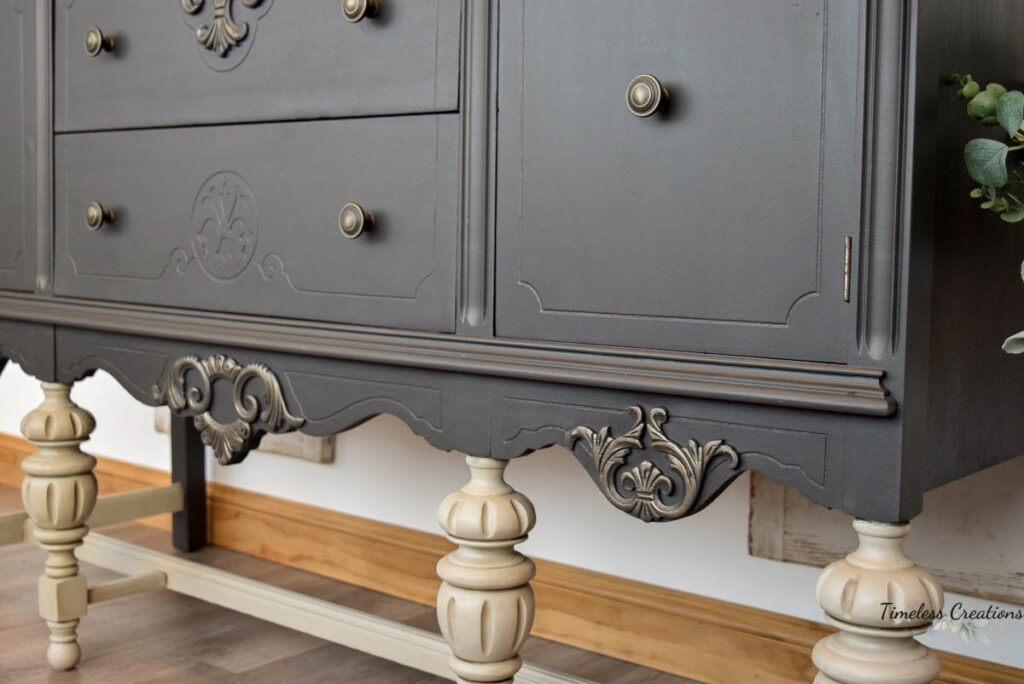
I then added some gorgeous metallic bronze knobs and metallic bronze paint to the raised details of the buffet! And aren’t they just gorgeous! I wasn’t 100% sure about the metallic bronze paint as I tend to go more plain, but Vicki talked me into it. She was right! It added some beautiful elegance and a touch of pizazz to the piece.
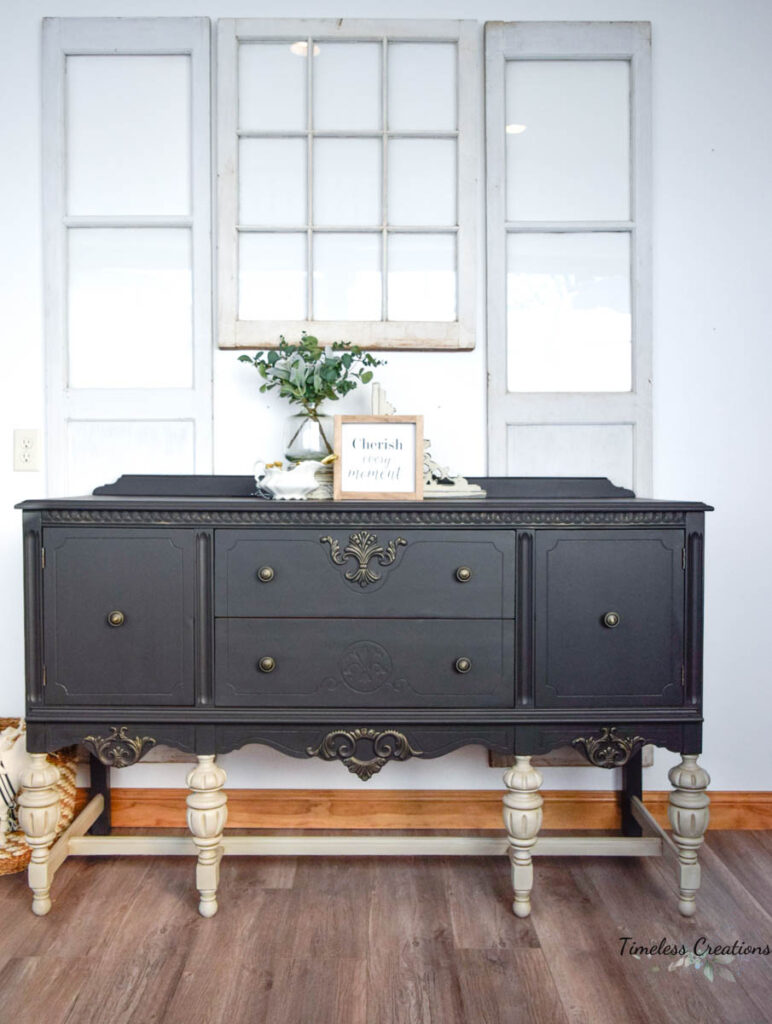
It really made those raised details stand out. Cast Iron as a color is just so versatile in the way it can allow for the warmth of browns to go with it along with grays. Such a beautiful off-black color.
It’s just so rewarding to transform a piece from broken down and dated to one with a new life!
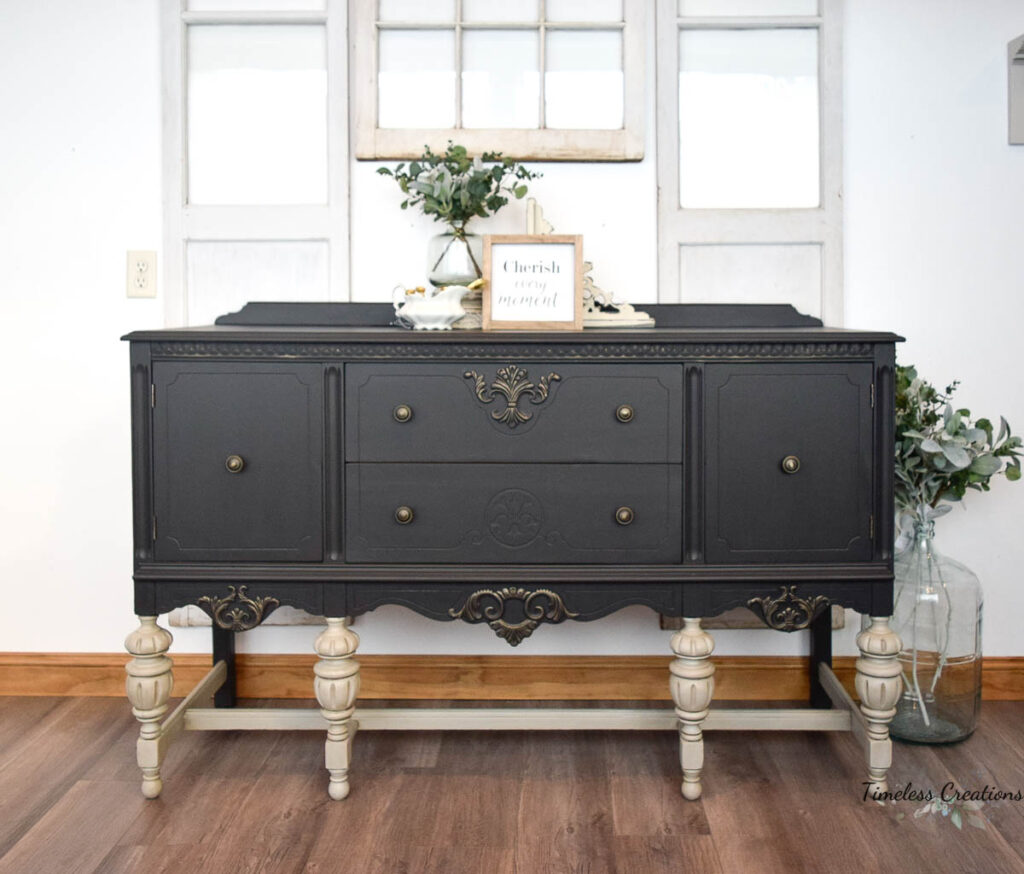
Products Used: Fusion TSP / Cast Iron / Pebble / Cappuccino Stain & Finishing Oil / Metallic Bronze



Leave a Reply