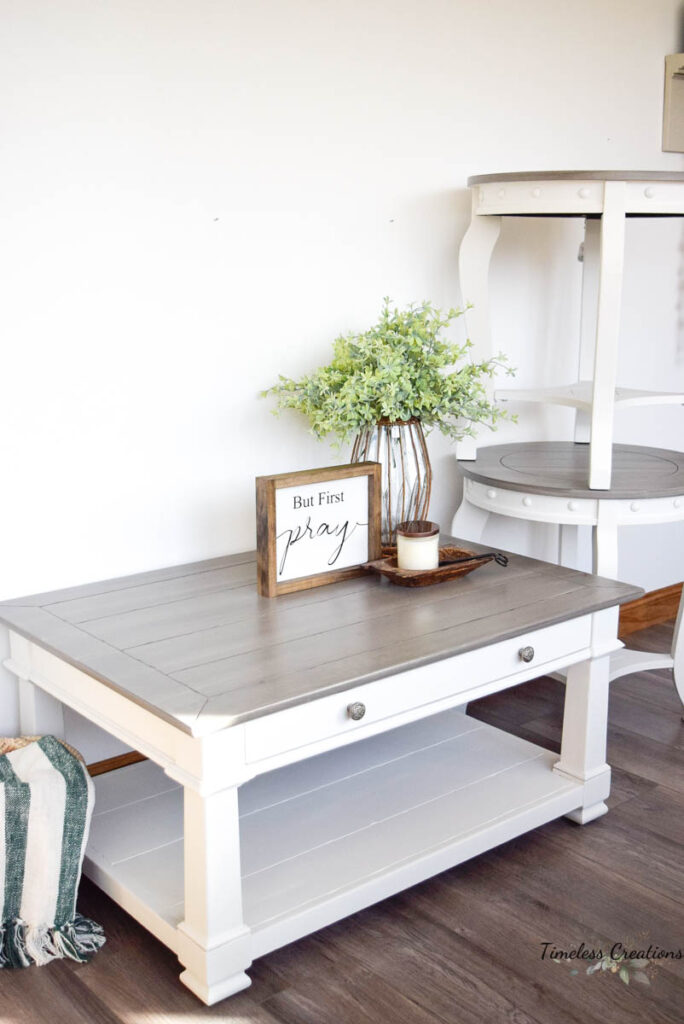
Do we have a treat for you in this blog post! This is such a fun created look and looks absolutely beautiful. We just finished a coffee and end table set in a gorgeous white and weathered gray look we have done before with other products. We just recently tried this blended look using our Fusion Mineral Paint products that we carry in our store and online. We had previously seen other artists’ blended work using Fusion stain and finishing oil, but hadn’t tried the look ourselves. So this project was the perfect opportunity to try it!
Surprisingly I didn’t receive these pieces as a set, the end tables were found at auction and the coffee table was one my sister had picked up. They looked so similar that I decided to put them together to create a nice set.
After doing all the necessary prep work (filling holes, cleaning and scuff sanding) I started off by painting all of the pieces with the Fusion color “Parchment” – a lovely white with a gray undertone. This white had pretty good coverage even over these dark pieces.
As all the pieces had shelves it was kind of a process to do the full underside and then flip over to finish, but it was still an easy enough paint job. We went over the entire piece with this color – except the top.
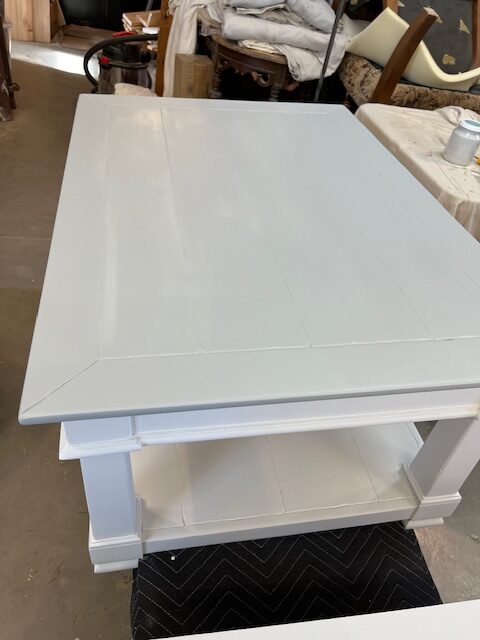
The top I painted a quick basecoat of “Pebble” which was a few shades darker of a gray. This would be my undercoat and starting point of the weathered top.
Once all the basecoats were on and completely dried I could begin the fun blended look using Fusion’s Stain & Finishing Oils. (It was a couple days before I got back to these pieces but I would let your basecoat dry for at least 24 hours before adding any SFO)
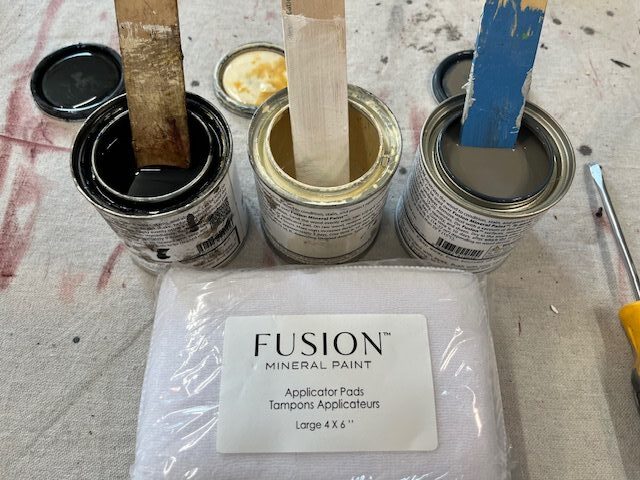
I started by choosing a couple different colors from the Stain and Finishing Line – Driftwood, Ebony and White. This would give me a lovely mixture of light and dark colors. (Be sure to stir them well before starting.)
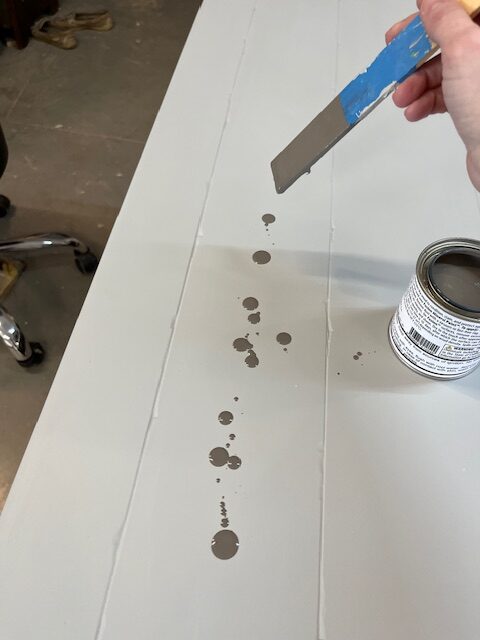
Then I began by drizzling each color onto my table top. I started with Driftwood and put a good coating of this color on the top. As you can see I just used the stir stick to drip it onto the table top.
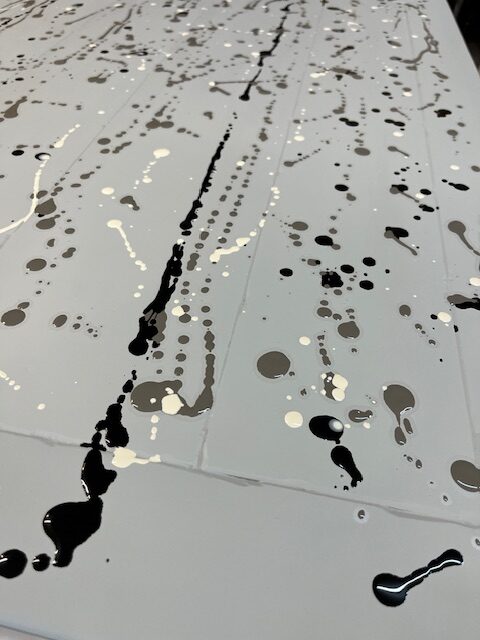
Then I began dripping on the Ebony and White all across the top. I used just a little less of these colors. There was no rhyme or reason on where I started and how much I used, I just trusted that I would be able to adjust with more of one color as the blending process continued. It was kind of experimental! I DID however, be sure to do one tabletop at a time instead of drizzling on all three at once.
Then came the fun part of blending it all together! I used one of Fusion’s “Applicator Pads” which work really well with the stains. I lightly misted it with water ahead of time as I find it helps the applicator to glide smoother. I started on one end and kept the applicator pad flat and began running it over the tabletop.
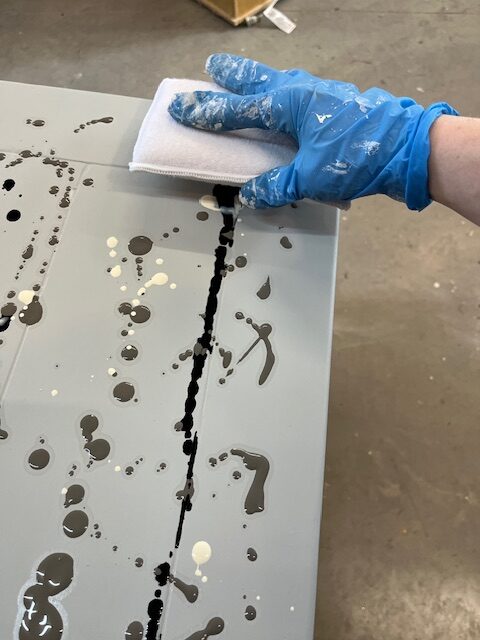
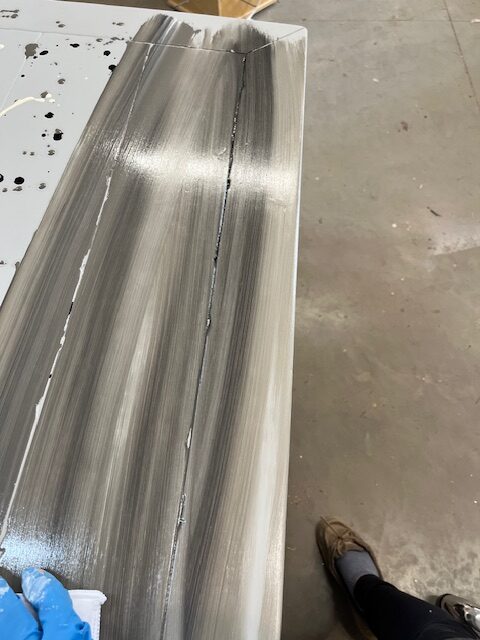
It looked a bit dark and scary to begin with and I had to be sure to move enough stain into the grooves on these tables, but as I kept going it blended perfectly!
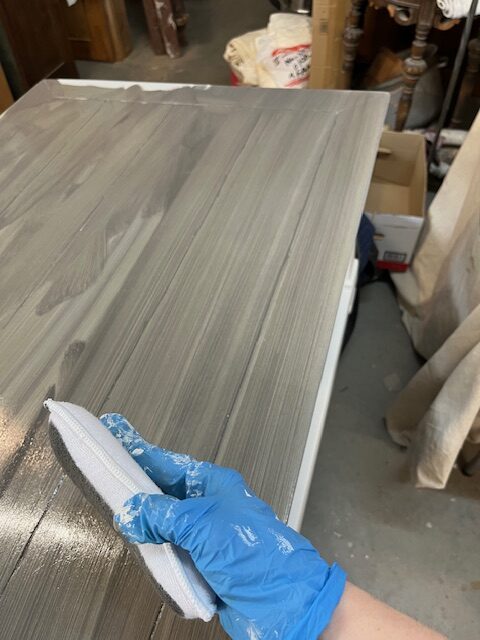
You can see here in the photo above that while blending I went back and forth to get all the colors mixed, but once they were mixed I went in long straight strokes from one end of the table to the other so it was one smooth stroke with no breaks.
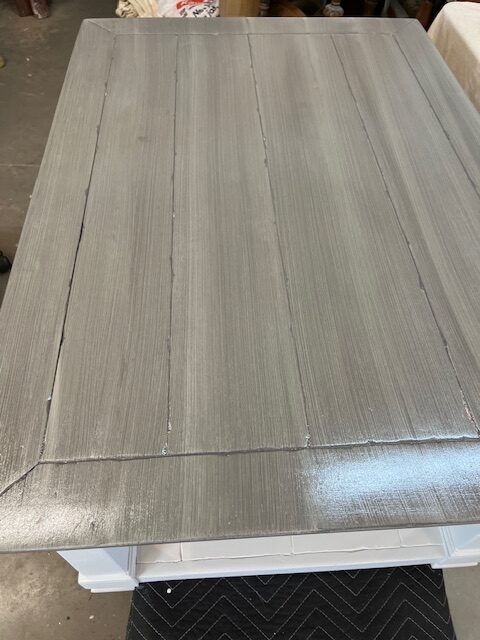
You have to move somewhat quickly here depending on your heat and humidity levels so the stain doesn’t start getting tacky while it’s drying. You also cannot leave it and come back and try to blend it again later, it will be too sticky.
You also want to keep a steady even pressure while blending or you risk spots where more stain has come off from your uneven pressure. I did find that with the amount of stain that I used here it did take a while before it was completely dry. I would say probably a few days it was still a little tacky to the touch. Just keep waiting and try not to touch it or you will get fingerprints in it!
And here’s how they turned out!
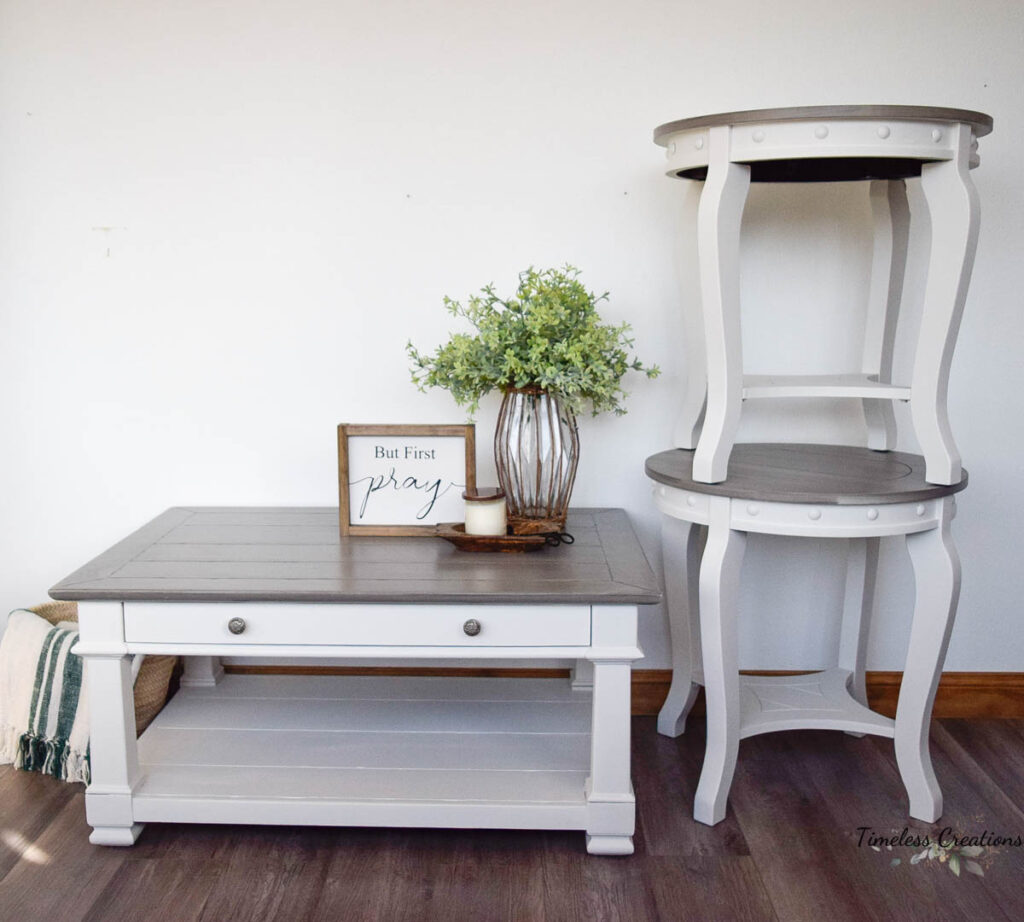
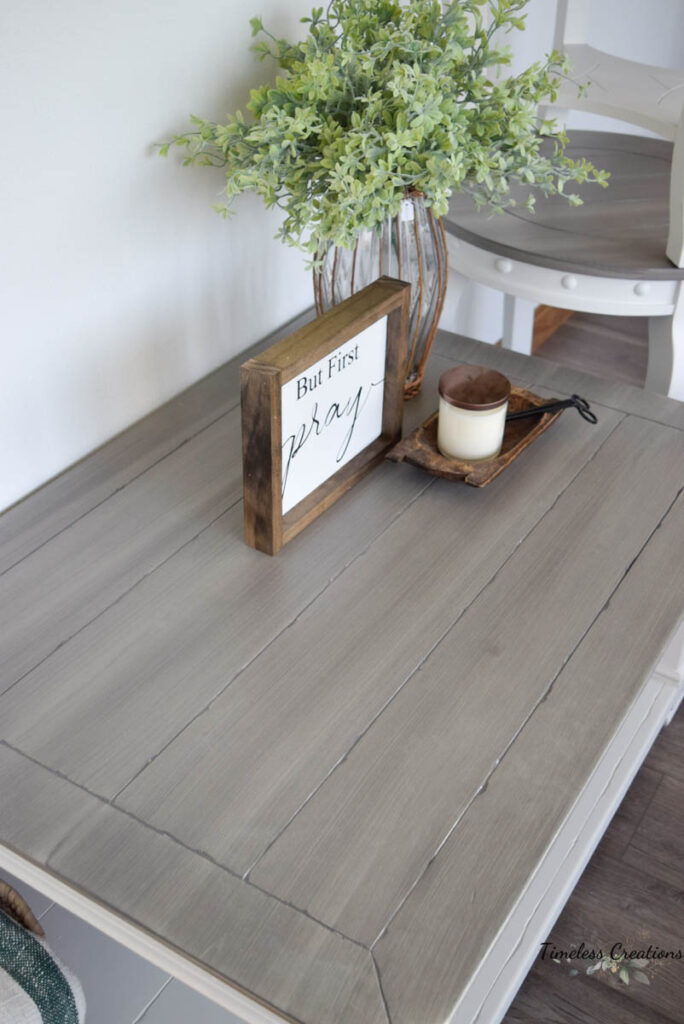
These pieces turned out just beautiful! We love the look of these contrasting blended tops with the white bottoms. And it was really neat to bring the three pieces together into a cohesive set just by using a bit of paint.
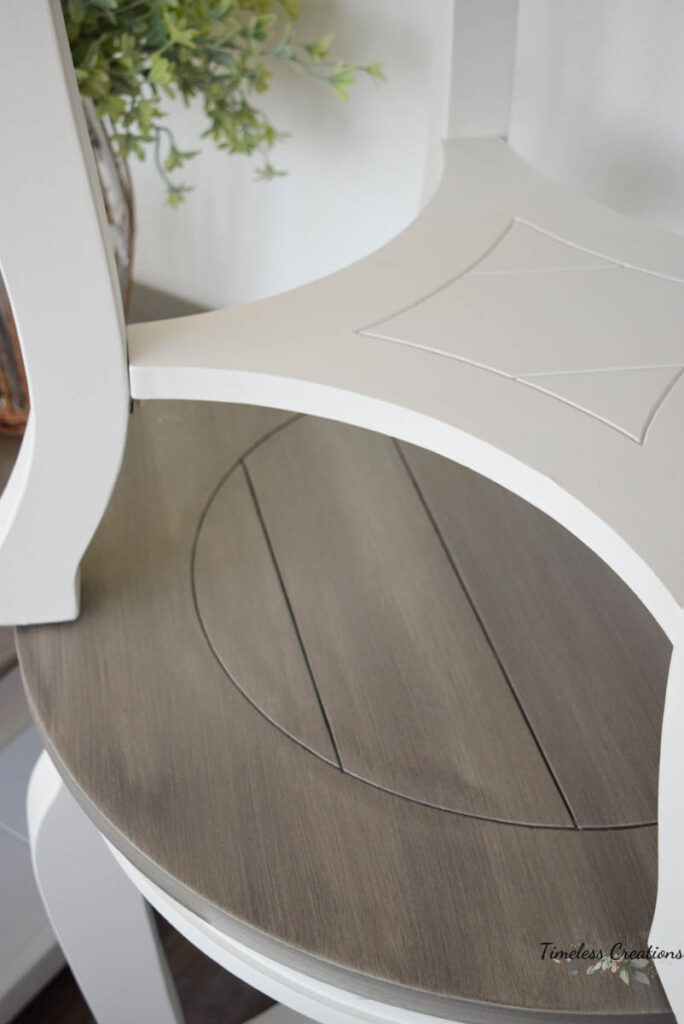
And when blending, it doesn’t have to be completely perfect, my biggest tip would be to do long strokes at the end when blending with the applicator. That is probably the most important.
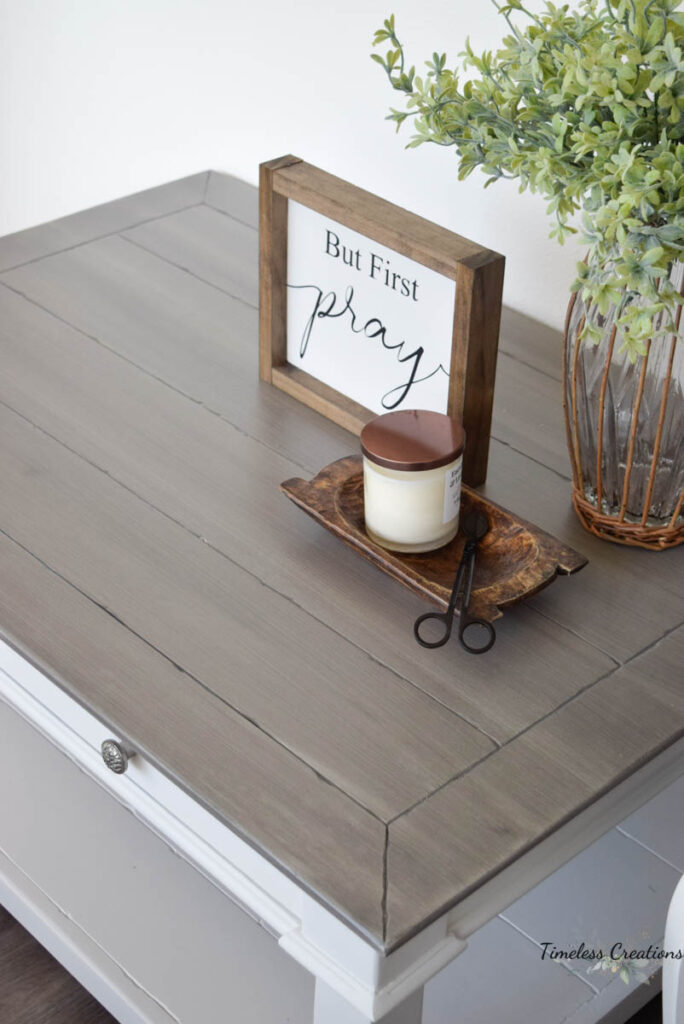
We weren’t the only ones who adored this look as this set of tables sold rather quickly out of our store with many interested parties! I’m sure it won’t be the last time we create a look like this – next time it would be amazing to do it with brown tones too! It is somewhat hard to find good quality end tables and coffee tables which are always in high demand at our store, but we are glad to have been able to source these ones. Keep following along for more DIY projects by subscribing to our email list (scroll all the way down to the bottom) or take a peek around our blog for more inspiration!
We carry all Fusion Mineral Paint products in store and on our website. Here are the products used:
Products Used: Fusion’s “Parchment” / Fusion’s “Pebble” / Fusion SFO Driftwood / Fusion SFO Ebony / Fusion SFO White / Applicator Pad / Wood Fill / Sand Paper / Fusion TSP


Leave a Reply