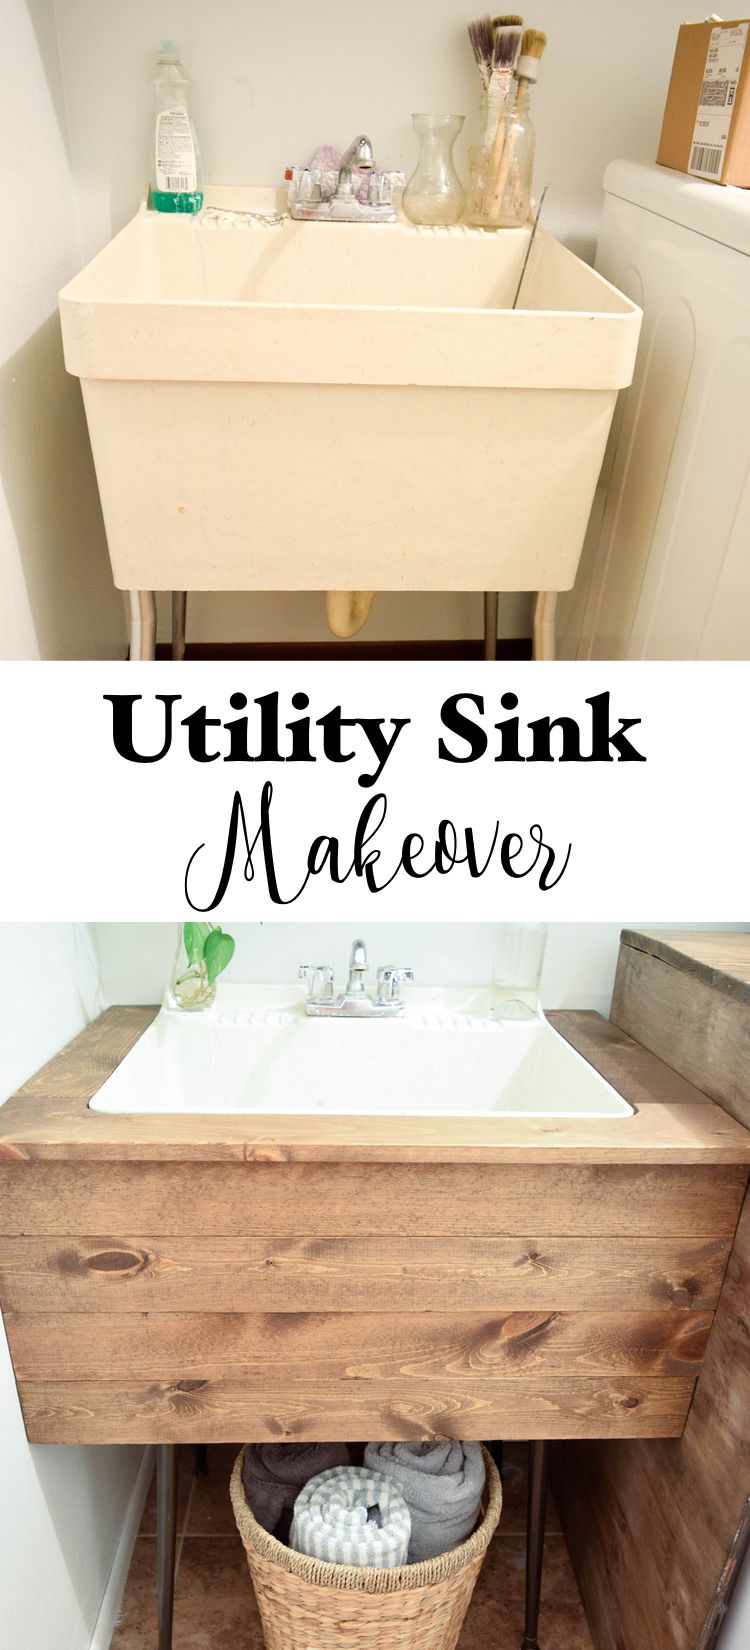
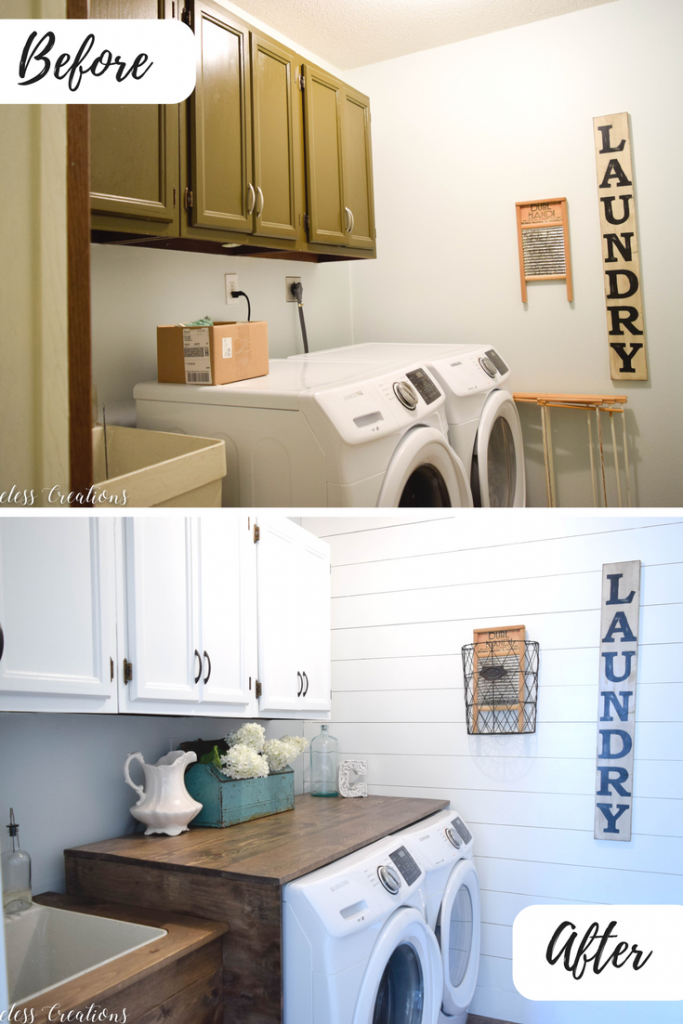
Last month for the $100 Room Challenge we restyled Kristen’s Laundry room with only a budget of $100 (like the title suggests). At the beginning of the month, we came up with the laundry room design, but couldn’t think what to do for the utility sink. We knew we just had to cover up that ugly little thing but didn’t know how! Here is the story of how we created this stylish surround for our utility sink makeover
We toyed with a couple of different ideas at first, maybe fabric, maybe building a makeshift cabinet out of some leftover plywood…but nothing seemed quite right. So we continued work on the laundry room, leaving that darn utility sink until the end.
The weekend before the challenge was due to wrap up we decided to just dive in and create something for the sink. Luckily, Vicki woke up in the middle of the night and came up with a fabulous plan! She came over to work on it with a drawing and everything!
So instead of trying to figure something out as we went along, we had a definite plan that would work perfectly with this space! To create your very own utility sink surround just follow the tutorial below!
Here is what you will need:
-
- 1″ x 4″ boards
-
- 1″x 6″ board (only one for the front counter surround)
-
- Anchors and screws (only if there are no studs where you need to put the cleats)
First you need to plan. Take a look at your sink and decide if you need to do the sides. I did not need to plan either of the sides. We created the folding counter with a waterfall side that would become the sink side too, so all I needed was the front planks.
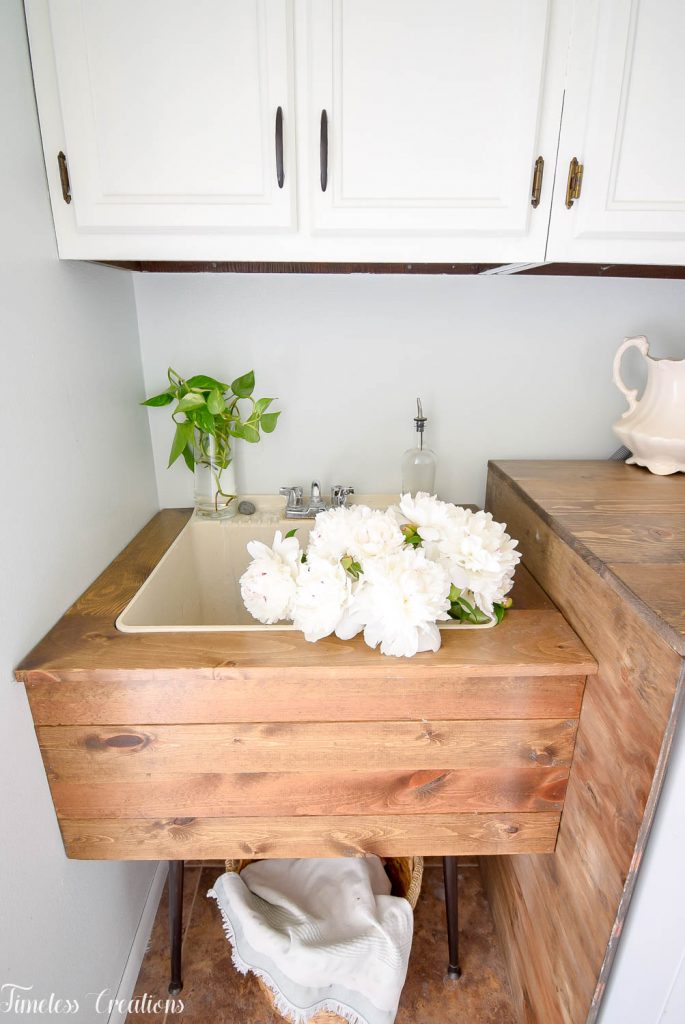
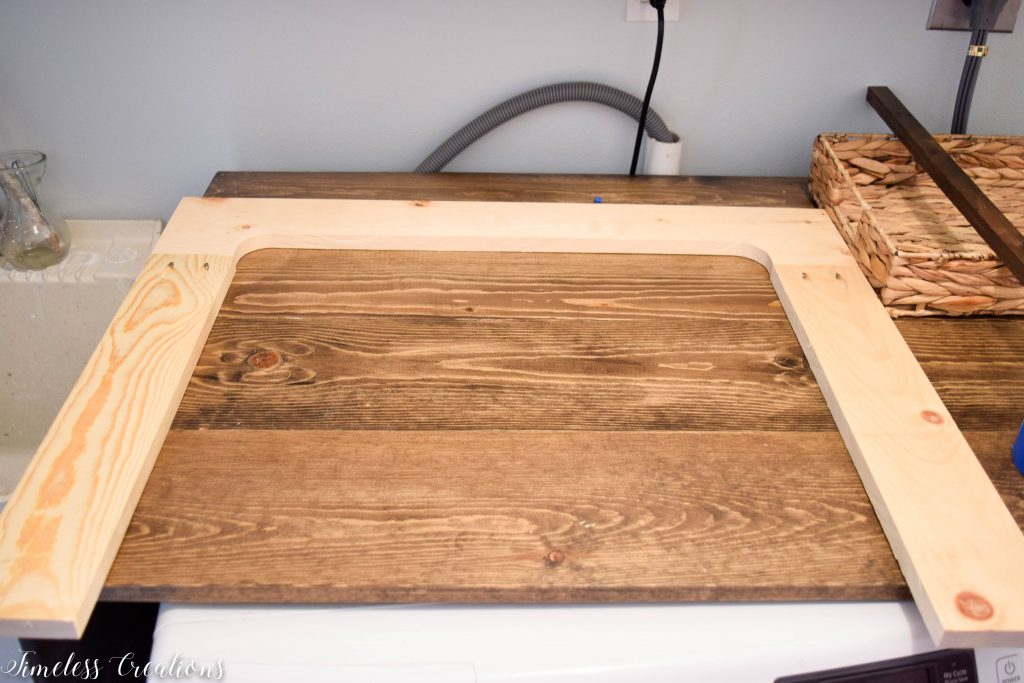
Second, create your top. We laid a 1” x 6” board horizontally across the entire front, overlapping the top of the sink in order to draw where we would need to cut out to go around the corners of the sink. (This is only necessary if you have rounded corners like we had) My dad laid on the ground and drew the lines as I kept everything straight and in place.
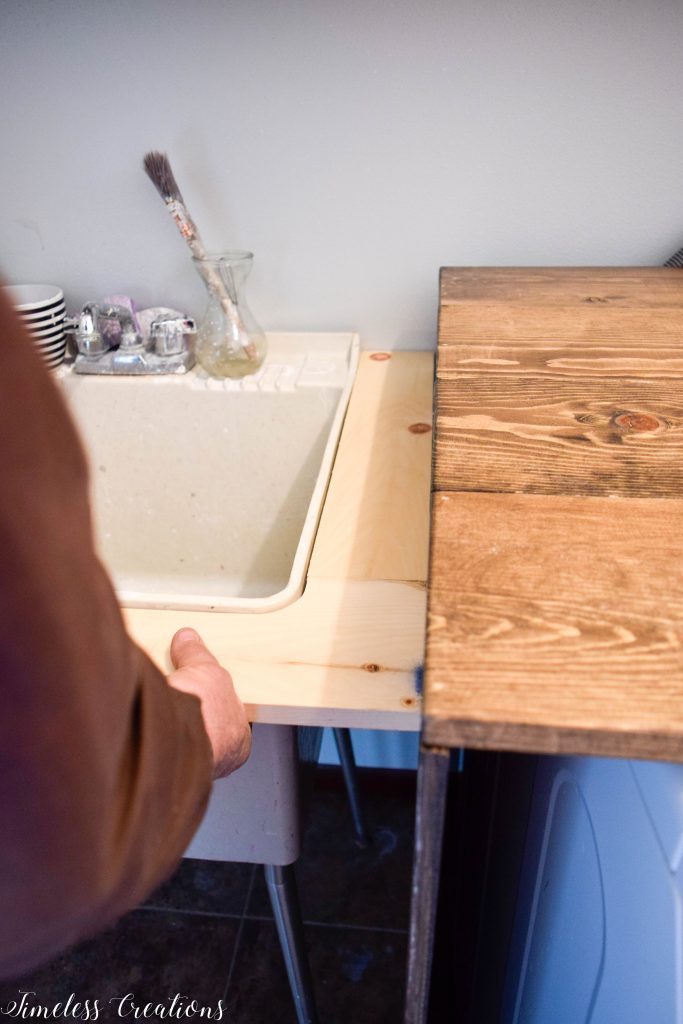 Then we clamped down this board and used our jigsaw to cut out the piece so the board would fit right around the corners. Then we measured from the wall to the front board we just made and cut some 1”x4” boards for the sides.
We then attached the two side boards for the counter to the front board using our handy kreg jig to keep them tightly together.
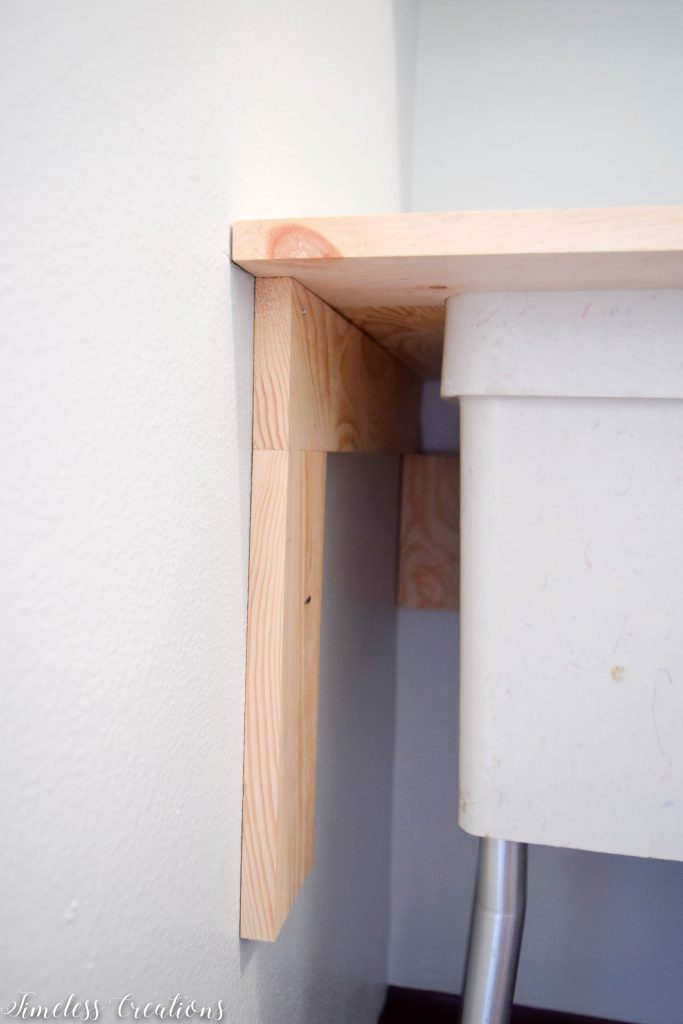
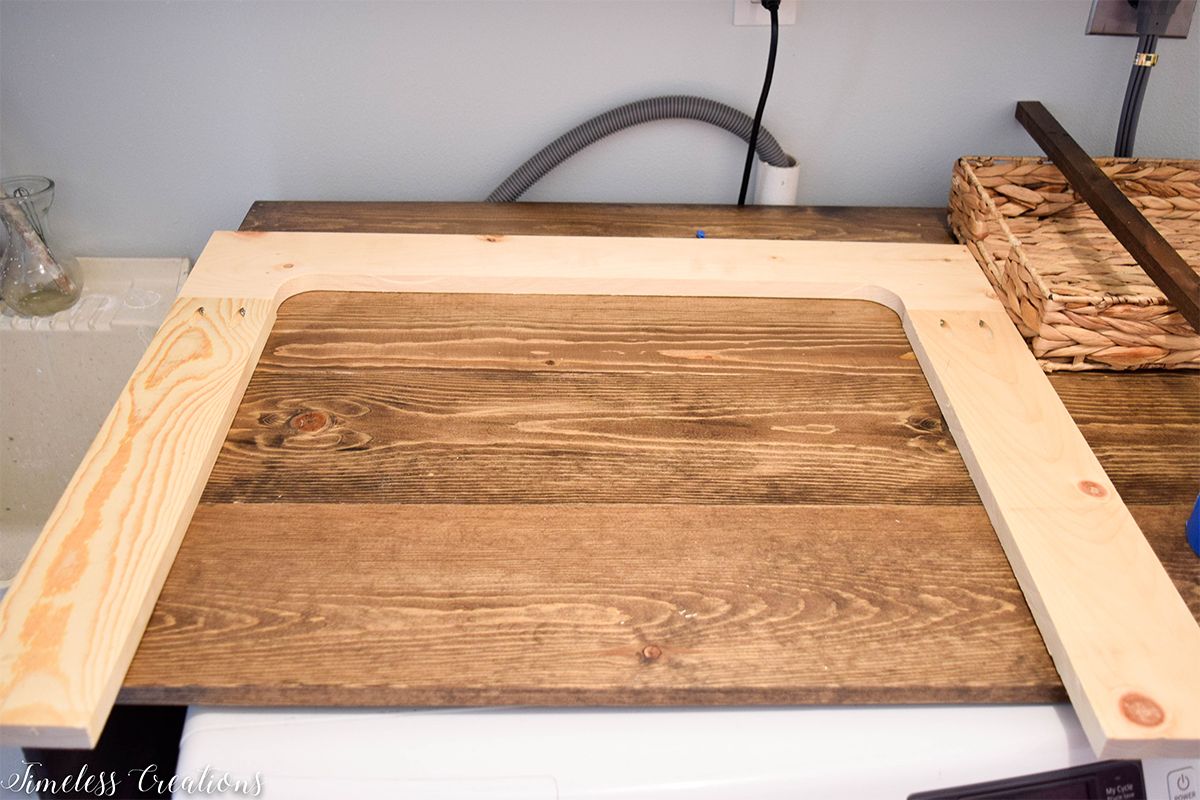 You can see how the kreg holes are up at the top of this picture, that is where we joined the side boards to the front countertop.
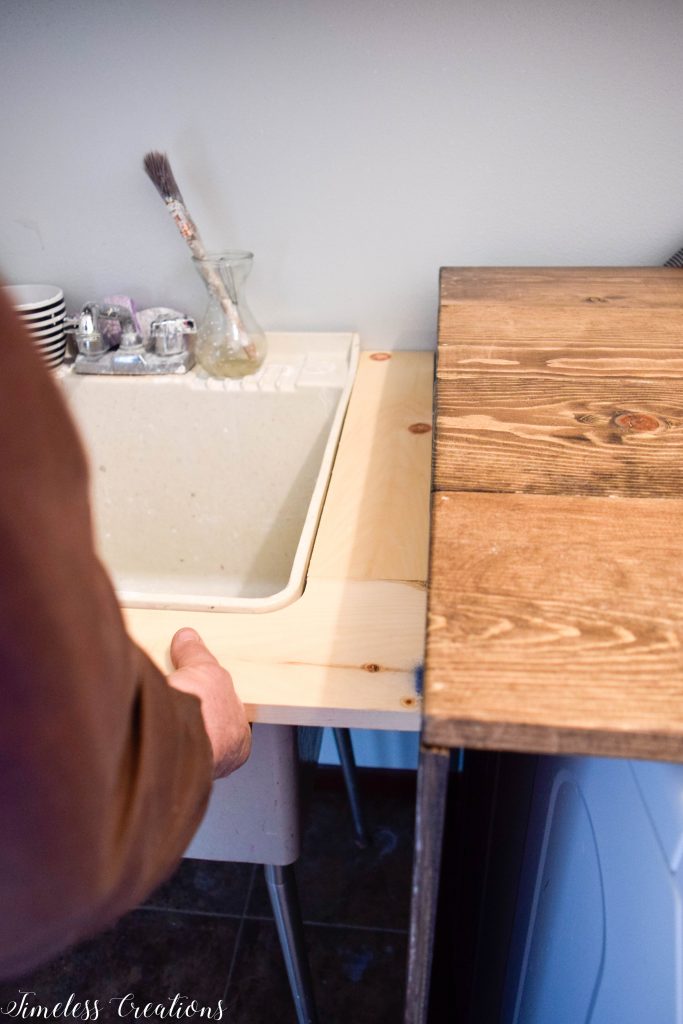
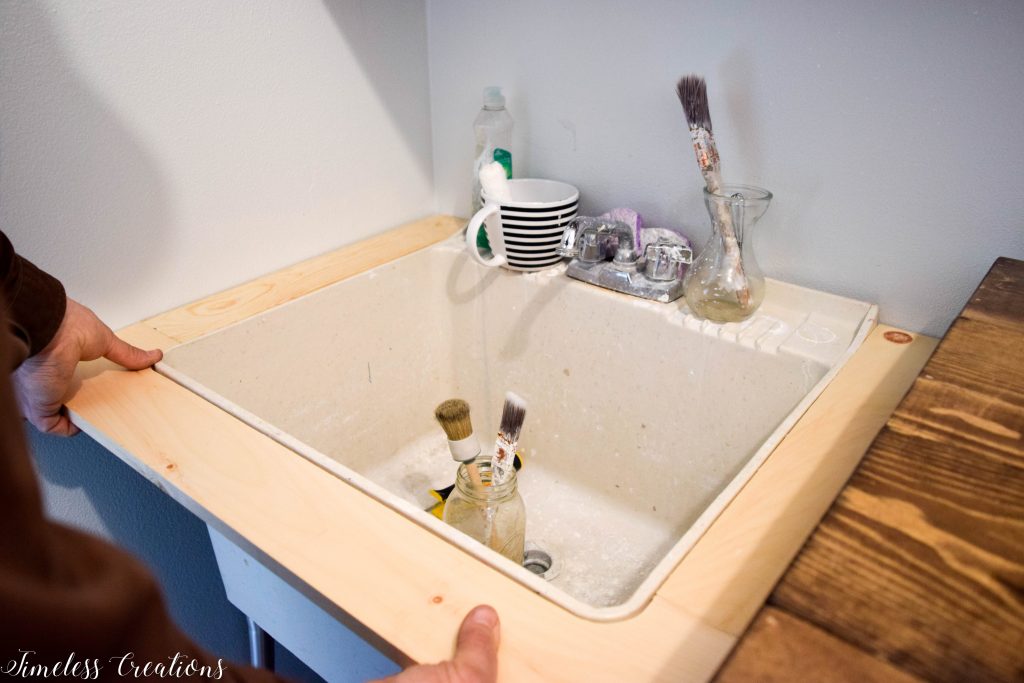 Then to connect everything and hold your makeshift countertop up we came up with a cleat system! One cleat was put on the wall in the back to hold up the second cleat along the side. The side cleat ran the entire length of the side board for the countertop. But that’s not all! We had to then attach a third board to go down in the front for those front planks to attach to! It was basically a way to hold everything up and together and to the walls.
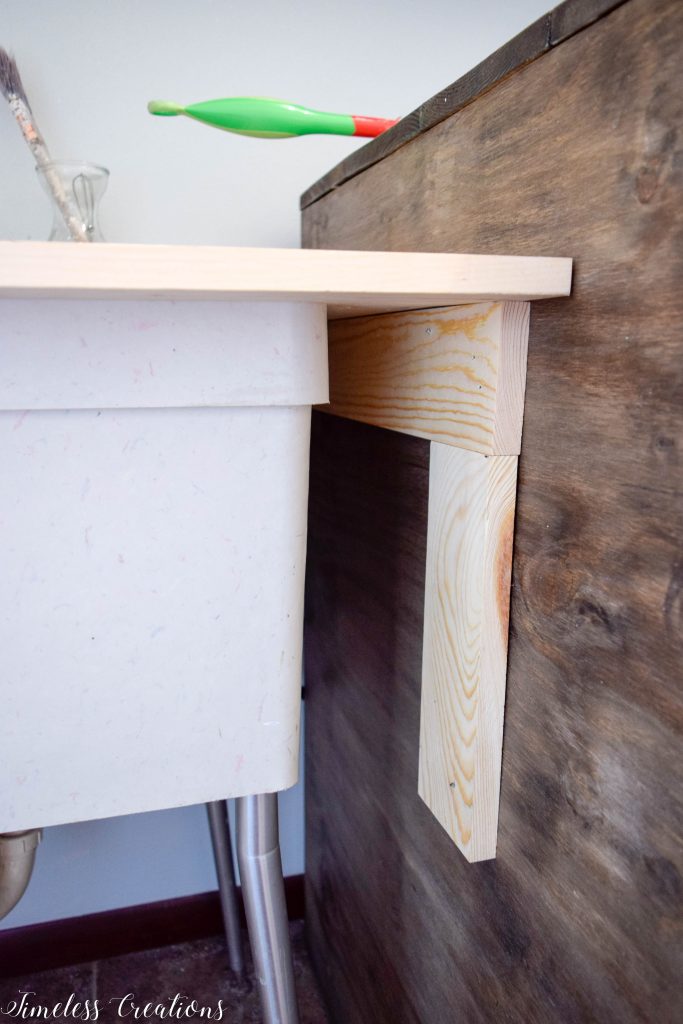 We created the 3-sided cleats and attached them to the back wall and the side walls. (You can see all of this in the pictures). We attached the cleats primarily with our nail gun. However on one of the back walls there was not a stud so we used a couple anchors and screws to attach to the drywall.
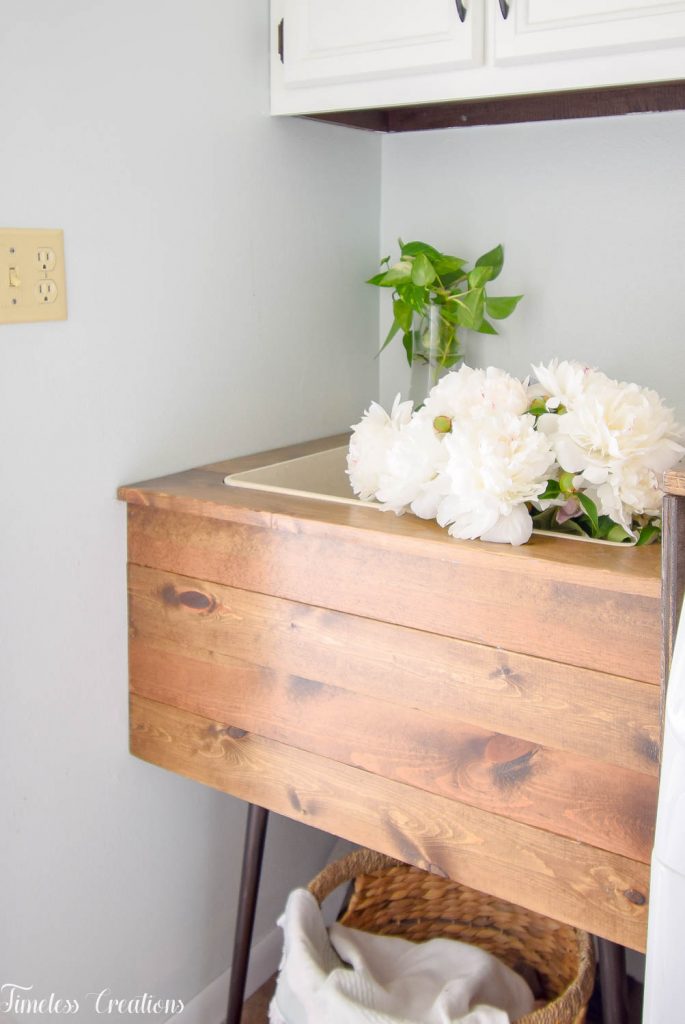
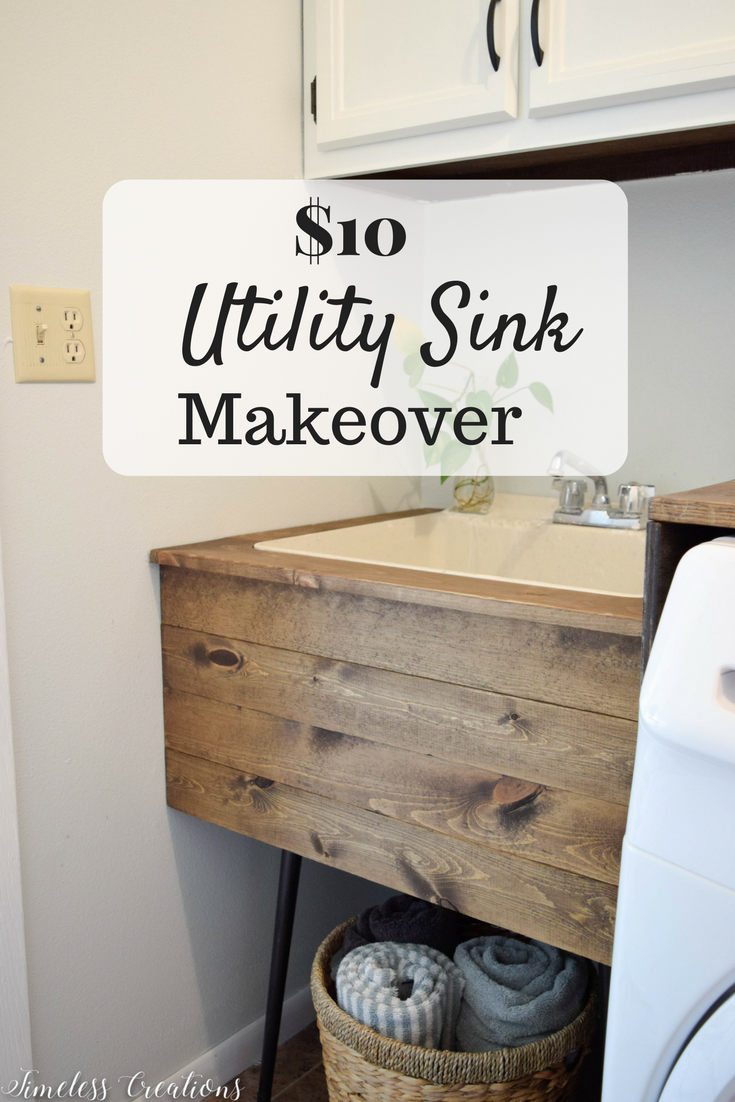
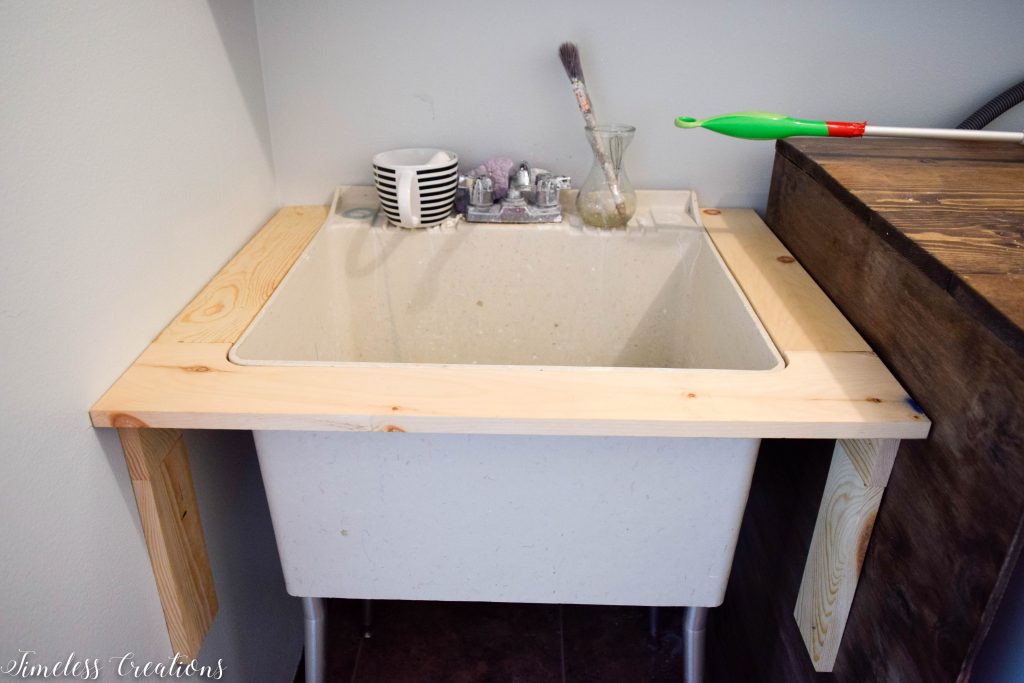 Then all that was left was to measure for those front planks! We measured and cut those planks and again used our nail gun to attach them to the front cleats! And that was that! It was much easier than some of our other plans, and very pretty too! We finished it up with the same stain as the folding counter and some sealant (that protects against water) then painted the silver legs of the utility sink with this spray paint!
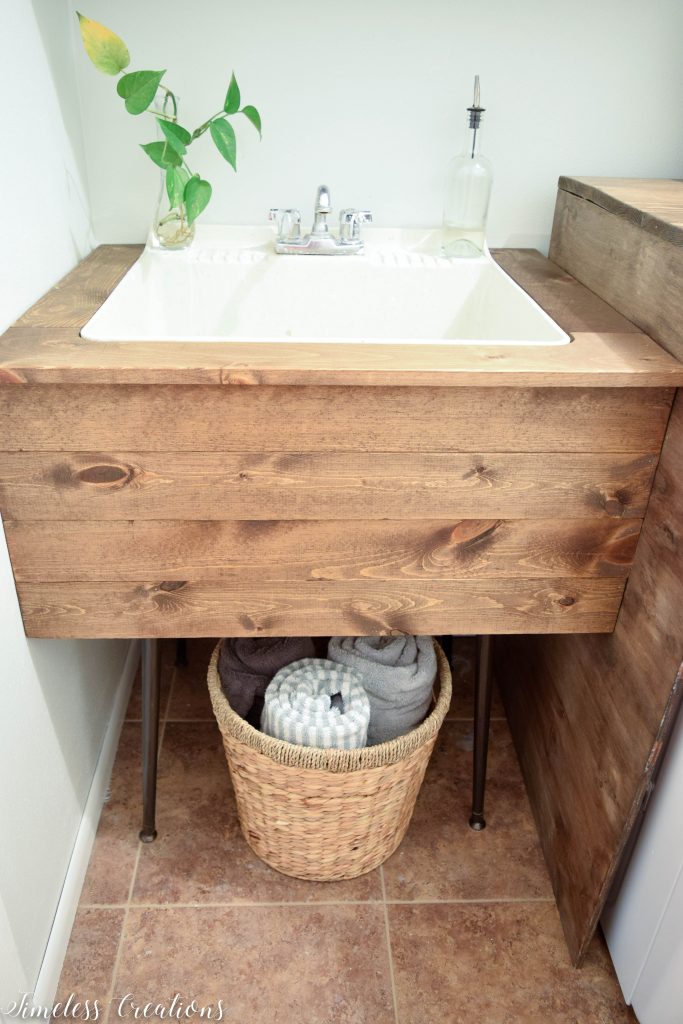
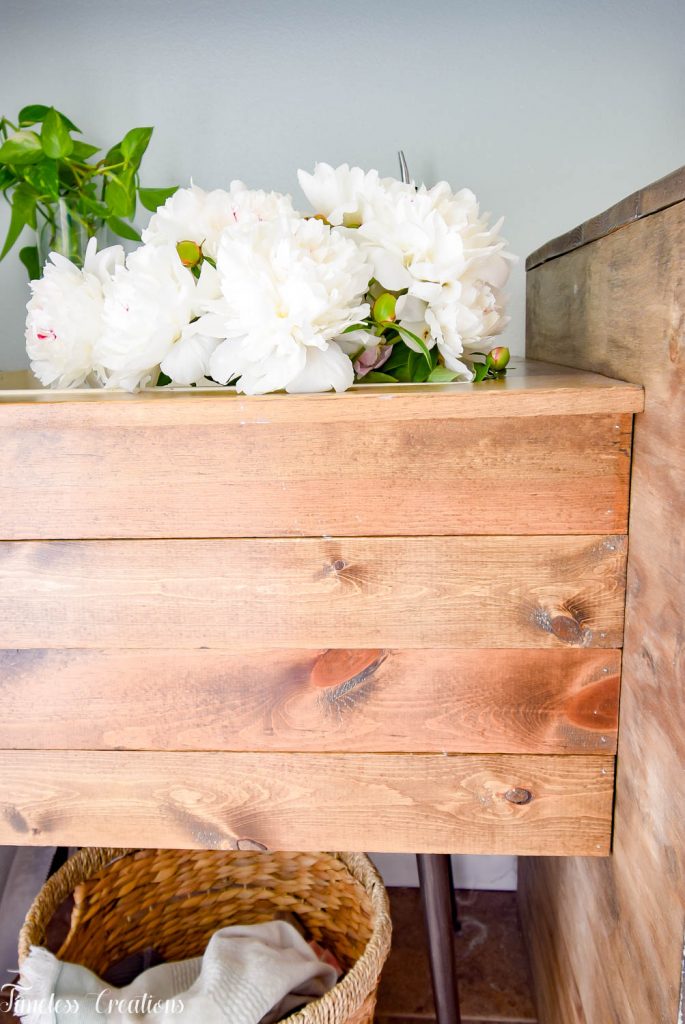
And Voila! My new utility sink was created! It may sound confusing when explaining it, but it is exceptionally easy.
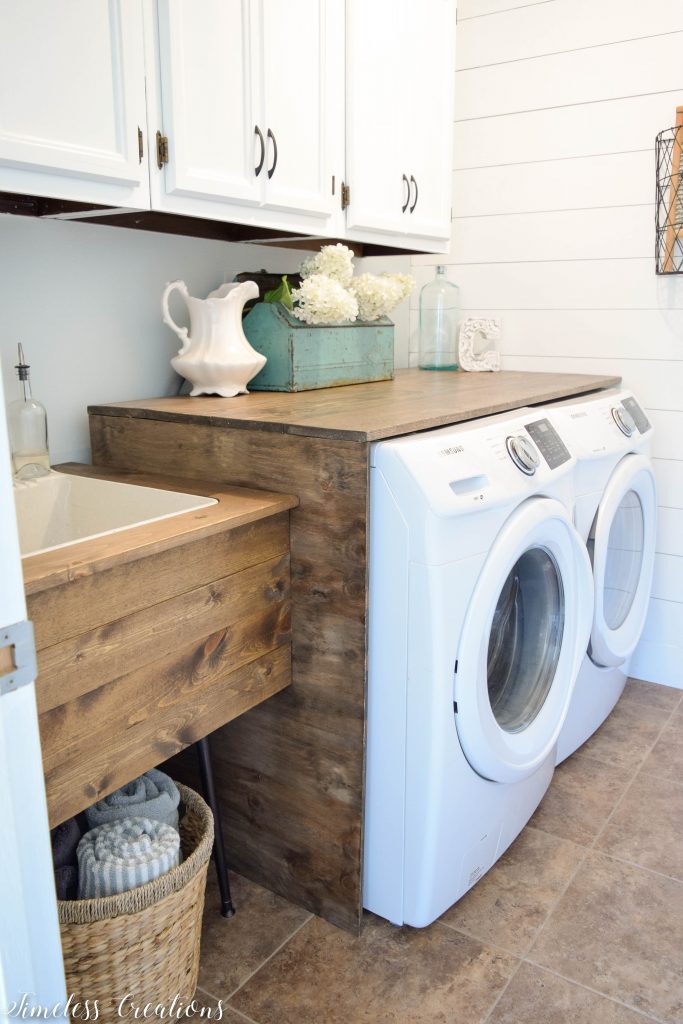
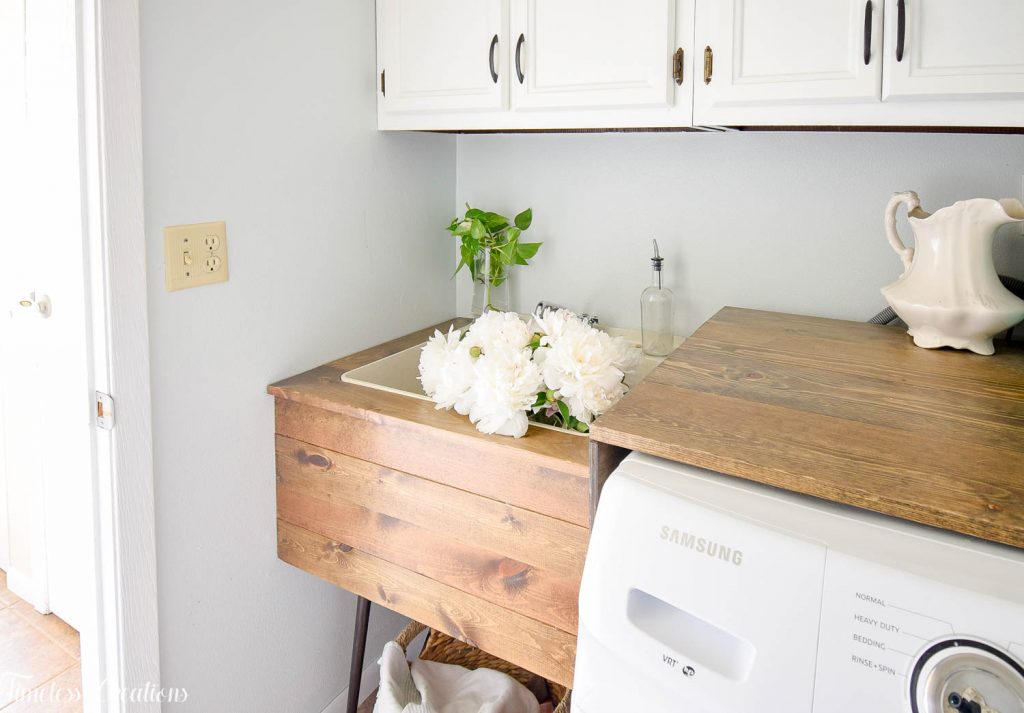
I just love how my new sink turned out, and I can honestly say that a utility sink looks stylish! And for such a minimal amount of time and money! The boards probably cost me around $10 or less, which is all I had to buy for this project. We had all the tools, the spray paint, stain and sealant already from previous projects! How neat is that?! If you have any questions, don’t hesitate to ask. And if you liked this project make sure to check out the full Laundry Room Makeover!
UPDATE:
We have had multiple questions about how to create this same look if your sink isn’t by a wall. This post explains how to use the wall on one side and our folding counter as an anchor on the other side. If you don’t have these options, you would need to create some kind of inner framework. Just like creating an internal box under the planks. You could anchor that framework to the back wall, but you would need to make sure your corners and bottom were all sturdy by creating that box. You could do that with your nail gun OR the kreg jig – either way!

More from our Room Makeover Series:
- DIY Marble Counters
- Farmhouse Kitchen Reveal
- $100 Family Room Makeover







It’s beautiful and inspiring! Great idea and thank you for sharing it!
Oh you are very welcome John! Thank you so much for visiting and letting us know you enjoyed it!
What if you have a top load washer next to it.
Hi Sandy! See the “update” at the end of the post. You will have to make a “box” to go around the outside of your sink which will make up an inner framework where you can just nail the plank all the way around your sink.(Both sides and the front) With a top load washer you wouldn’t be able to create a folding counter to attach your sink boards to.
Did you switch out the utility sink legs? If so can you link or post a tuturial. The white legs won’t look nearly as good as the legs pictured.
Our laundry has the same set up with the big white sink legs. I already had plans to cover the washer and dryer then came across this post. Adding the sink will really complete the project.
Hi Cullen! Our utility sink came with those legs already. They were silver and we painted them Oil Rubbed Bronze. I know what your talking about with the white legs. They are plastic and already a part of the sink correct? You could check with a local hardware store, Home Depot or Menards to see if they have metal legs like these, but then you would probably have to cut off the white ones, correct? I would double check to see if there are metal legs you could get and if you could attach them somehow. Then there is the matter of cutting off our existing legs..It would be cool to get Hairpin table legs to use on your sink but I’m not sure if they would work with the height of your sink or how they would attach – but it’s a thought! You could also cover the white legs with wood, however I feel like it gets very chunky looking then…Good luck!
What stain did you use? Love the look! Thanks for sharing!
Hi Kari! Here is a link to the EXACT stain we used! https://amzn.to/2A0enQf
So it was the dark walnut stain or just that brand?
Hi Amy that brand, Minwax in the Dark Walnut color is what we used!
Did you happen to repaint your actual sink? I have a similar one and it’s just terribly stained and ugly. I wondered if it would be okay to spray paint…?
Hi Carol! We only painted the legs of the sink, on the bottom. As for the actual sink we just cleaned it. Mine is stained a bit, but after having a bathtub paint peel on us before we decided against painting it! You could talk to someone at a home store to see if there is a product out there that would work for updating the actual sink part. Sorry we aren’t more help!
Can you share how you did the waterfall side?
Hi Vicki! Sure! The waterfall side is 1/2″ thick nice grade plywood. It was cut the same width as the folding counter and as tall as I wanted the counter to be above the washer and dryer. It was then stained and sealed to match. We were able to glue and nail it to the folding counter.
I love the wooden look so unique and beautiful.
My laundry sink is wall hung – no legs. I have a wall on one side and a fridge on the other. Maybe just bring the sides down to the floor for support since I don’t have another side to secure to??
Oh yes! That is certainly an option, and would look equally as good.Like a cabinet! Just make sure there wouldn’t be anything behind the built in you would need to get to. Like an outlet you use frequently or anything.
I am wondering if this is possible/will look silly if I only have 2” on both sides of my sink rather than the 4??
Hi Amanda! I don’t think it will look silly at all! I think any kind of way to help improve those darn utility sinks will be amazing! I did use a 1 x 4 board however the actual width of that board is only 3.5″. So you would only be off by a little bit. You can always cut a board and hold it up to see how you like it!
Did you use dark walnut color stain? That’s what came up on the link, just wanted to check.
Hi Rachel! YES we used Dark Walnut stain just like the link says. You can create a light dark walnut look by only doing 1 coat and wiping it off. If you want the color darker, once the first coat dries put on a second coat! Thank you!
I’m having trouble getting the pictures to load at all. Is there anyway you could send me the pictures of each step?
Hello! I am not sure what happened to the photos there but they should be working now! I had to go and re enter them.
Wow! Just beautiful! Great job!!!