Hello again! We are back for week 3 of the $100 Room Makeover Challenge where we are restyling my laundry room! Like the title states, we only have $100 and one month to finish the Challenge! If you missed the first couple weeks or need a little refresher take a peek back by clicking below.
Week 1 / Week 2 / Week 3 (You are Here) / Week 4 / Week 5
First off: Thank you all for the prayers. My grandma is doing a lot better after her stroke. She is doing therapy for her left sided weakness and the doctors are impressed with her progress!
But back to the challenge – we were able to get a little more done this week! It has been an extremely busy January for Vicki and I which has made it difficult to find time to work on this room. That being said we have started painting behind our faux shiplap wall as well as the folding counter!
All of the 1 x 8 planks for the folding counter were put together using a biscuit joiner (now my new favorite tool!) and wood glue. We first cut all of the boards to the correct length. Then using the biscuit joiner we cut really shallow holes in the sides of the boards. You then use wood glue and little “biscuits” (oval disc like things) that go into the grooves on each board. That then joins them together! Seriously – it’s a wonderful tool.
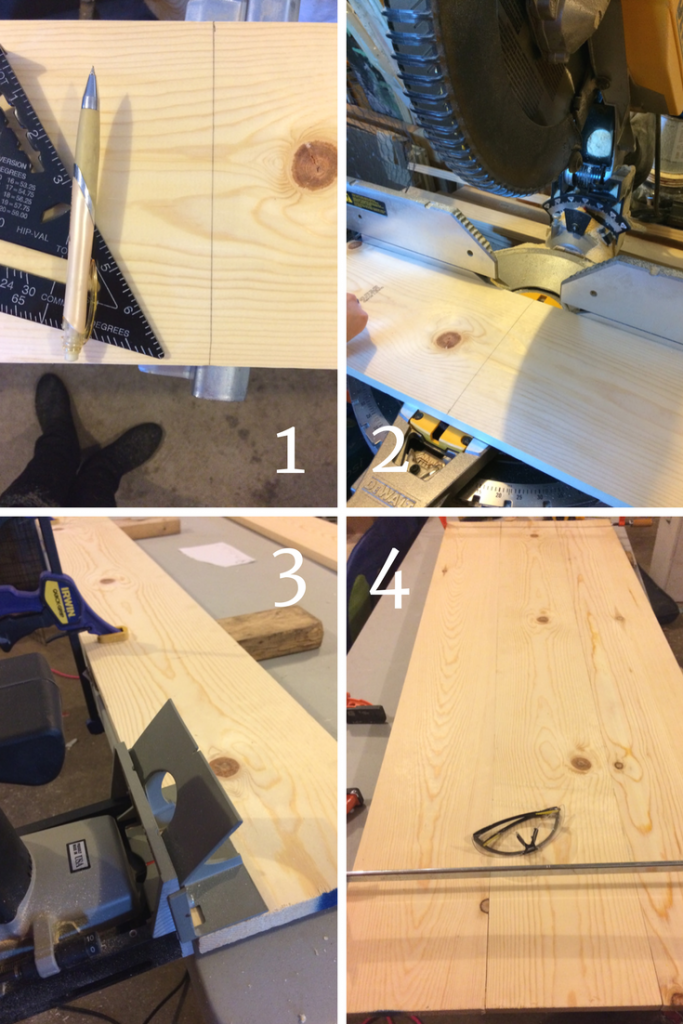
By creating the folding counter with that method I was able to get the boards really flat and very close together.
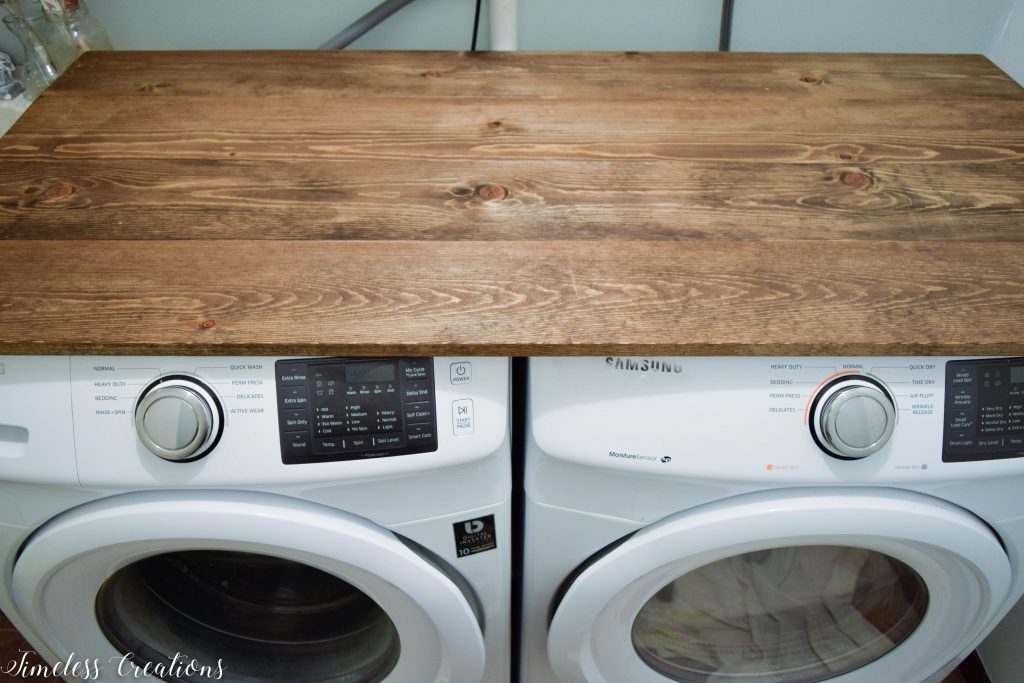
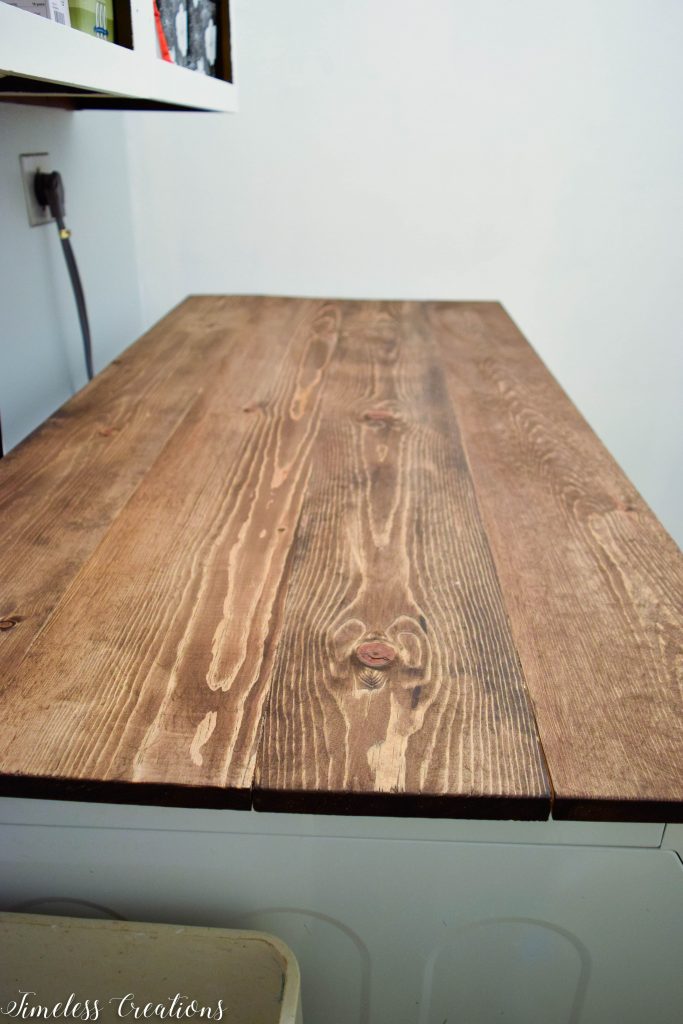
I then used pre-stain to prepare the boards for my favorite color stain. We weren’t able to install the folding counter quite yet because we still need to install that shiplap wall…
We did paint the feature wall so it is all ready for the shiplap, and ripped down the 1/4″ plywood into strips.
Also, the cabinet frames are completely painted! Yay! Just have to finish the doors. So when it’s all written down we actually did get a lot accomplished! It just doesn’t really look like it…Ha!
Here is what it looks like so far.

So let’s take a look back at the list of everything I need to get accomplished yet.
- Add a Shiplap feature wall (faux shiplap of course)
- Paint the cabinets
- Paint the trim
Build a folding counter- Do…something…for around the utility sink (I know…what a plan!)
- DIY a light fixture
- Decorate
Even though only one item is crossed out, we have almost everything else started! I even started gathering some items I could use for decorating!
Don’t forget to see what everyone else from the challenge was up to for this week! (See the links below) And next week we hope to have the shiplap wall completed! Whoohoo!!


Looking great so far and I love the wood!
Oh wow. That wood counter is such a great idea and it looks great!
I love the color of the wood. I will have to get some of that. It looks like you are making a ton of progress, just needs put together. Glad to hear your loved one is doing better. It has been a tough January hasn’t it! Looking good so far!
That wood counter looks amazing! I’ve never used a biscuit joiner. Sounds fun!
Your progress is looking good!
Looks awesome! Can’t believe how much you are doing with just $100!
Love the wood folding counter! I would love to make one like for my laundry room but I’m so not handy with power tools lol.
That countertop is awesome!!! Love it!
The counter looks beautiful… and now I feel like I need a biscuit joiner because the name is so fun 🙂 Sounds like you made a lot of progress this week… can’t wait for that shiplap!
I love the countertop! I’ve been wanting to do this but I have a top loading washer so I’ll have to wait till it dies. So glad to hear your grandma’s recovering!
So glad to hear your grandmother is doing well! It’s coming along! The countertop would look great in my laundry closet – That week where everything is started but not finished is frustrating – I can’t wait to see the end result!
Looking so good! Looking forward to seeing the reveal!
Looks great! Did you rest it directly on the machines? Does it bang at all? Thanks!
Hi Lisa! We actually screwed a really skinny board to the wall on the far side, and then attached the other side to the plywood by the sink that goes all the way to the floor. It’s like a “waterfall” edge.
Hi! I love this!!! What type of wood did you use for the folding waterfall counter? I want to do something similar but I’m not sure how thick it needs to be or what type of wood would be best. Thanks in advance!
Hi Erica! Thank you so much! I got just the cheaper wood of plywood. It is 1/2″ thick and has stood up well! You can get plywood in nicer woods like oak, but the name of our game for this one was to do everything for under $100 here so I got a cheaper wood (I think it may have been birch?) You will want to get a nicer “grade” of plywood. Meaning it is sanded on both sides, no patches or anything. I believe at Menards they are labeled like AC2, B2, and C2, “AC2” being much nicer and going down from there. I hope that helps!