A Simple DIY Wooden Christmas Sign
Hello and Welcome again to another week of the fabulous ‘Deck the Home’ Blog Hop! We have teamed up with 26 other bloggers to bring you a months worth of great Holiday projects for around the home. This week it is all about sharing DIY wooden projects that anyone can create! Come take a peek at what we created, and don’t forget to stop by some of the other bloggers projects via the links at the bottom of this post.
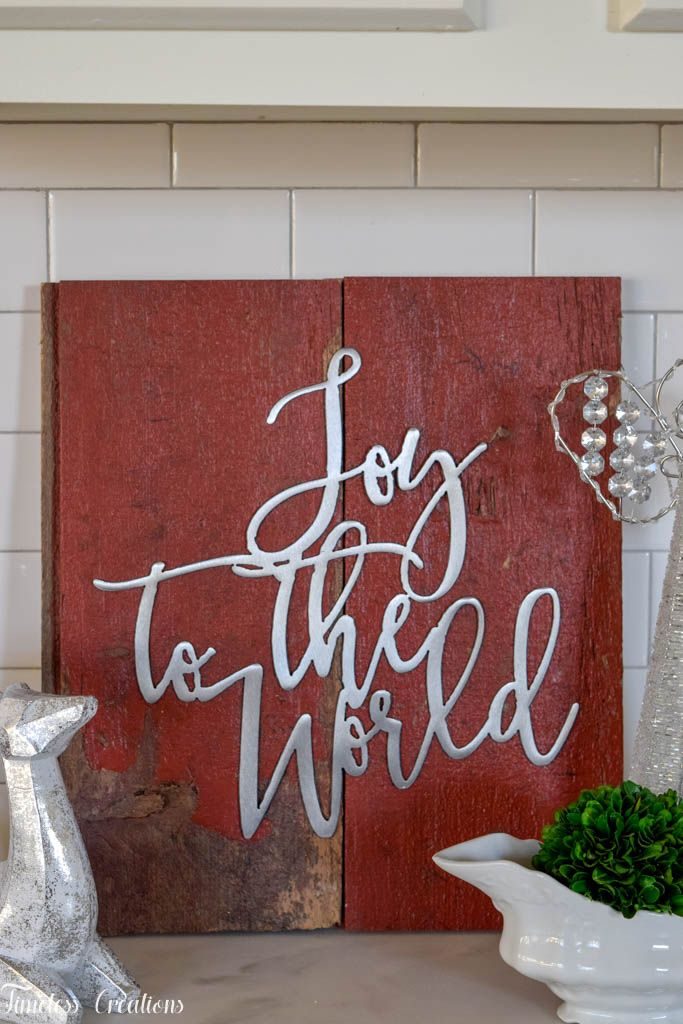
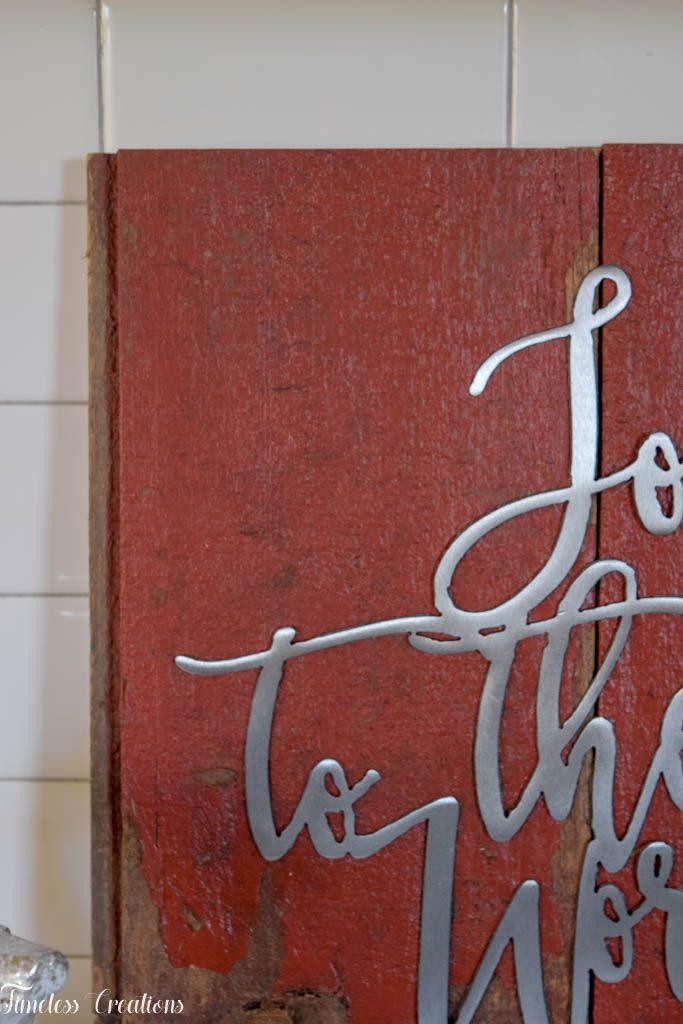
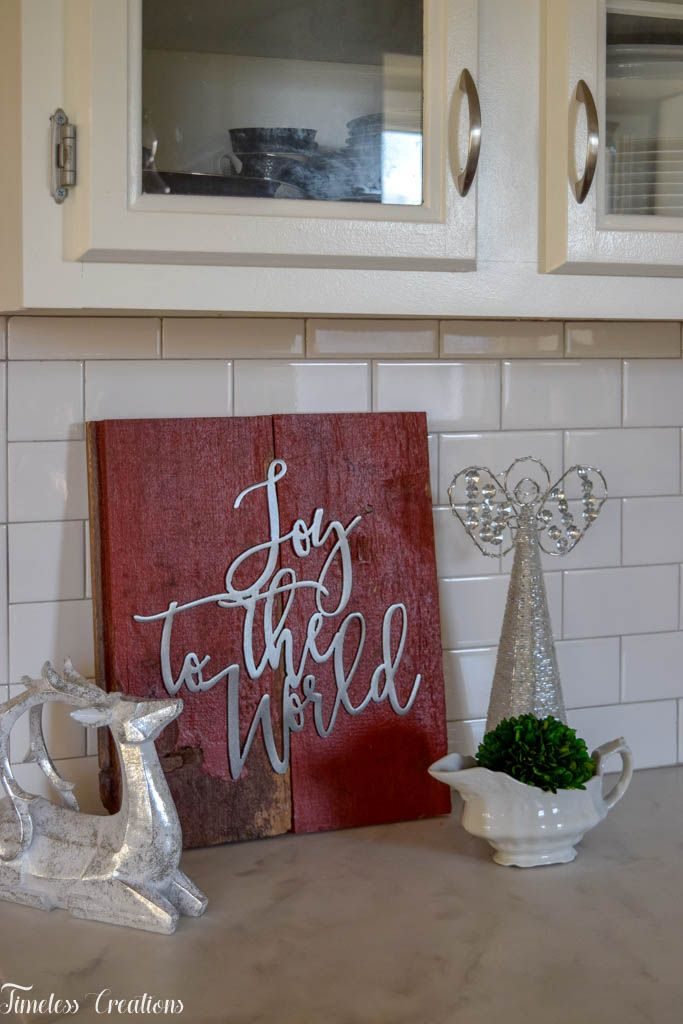
For our wooden project we were able to take a barn board from our stash and make it into a Holiday sign! Isn’t it cute?! Here is how to create your very own barn board sign!
What you will need:
- a piece of barn board
- wood glue
- wooden brace (we used lath)
- power drill
- screws
- metal words
- saw
- superglue
We first figured out our dimensions for our plaque based on the metal words we had already purchased. There are so many sources for finding custom metal words – HERE is where you can find a bunch. But you could always paint your saying on it as well if you didn’t want to purchase metal words. We did a great tutorial on easy ways to paint letters on signs. Find that HERE.
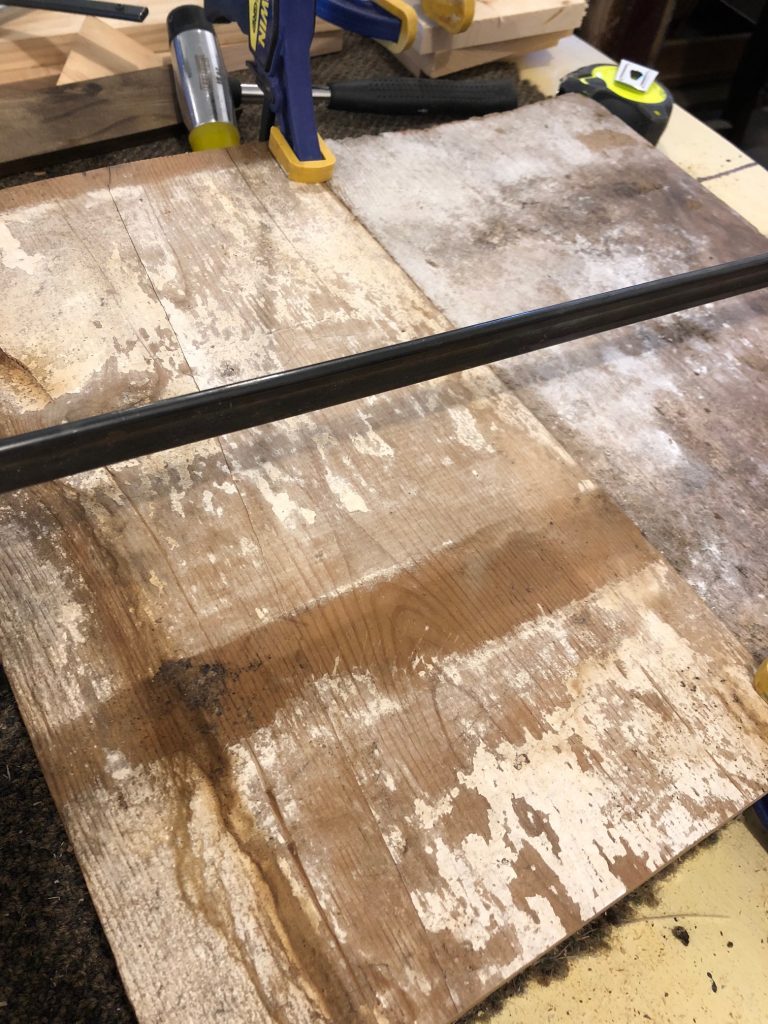
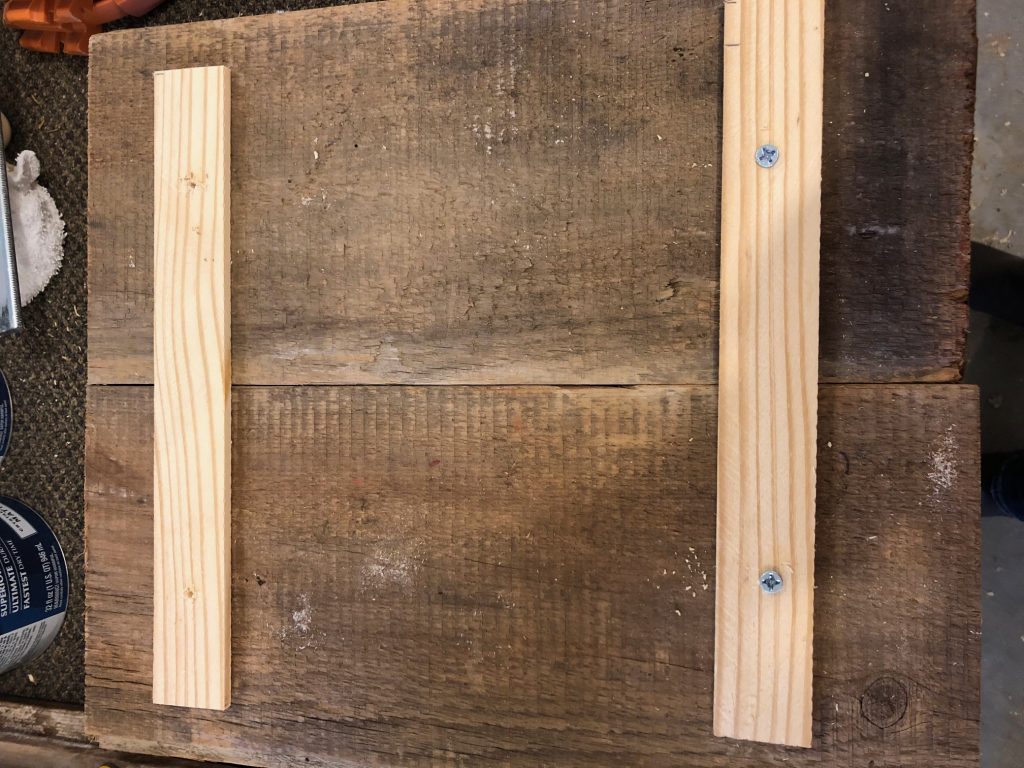
Since our barn boards were skinny and long, and our metal words were square, we needed to cut it down and place two smaller boards next to each other to create the squared look. We attached them by gluing and clamping them together. But to make sure there was extra strength we took two skinny lath boards and screwed them to the back of the barn board. One at the top and one at the bottom, The top lath was then where we added the hanging hardware for later.
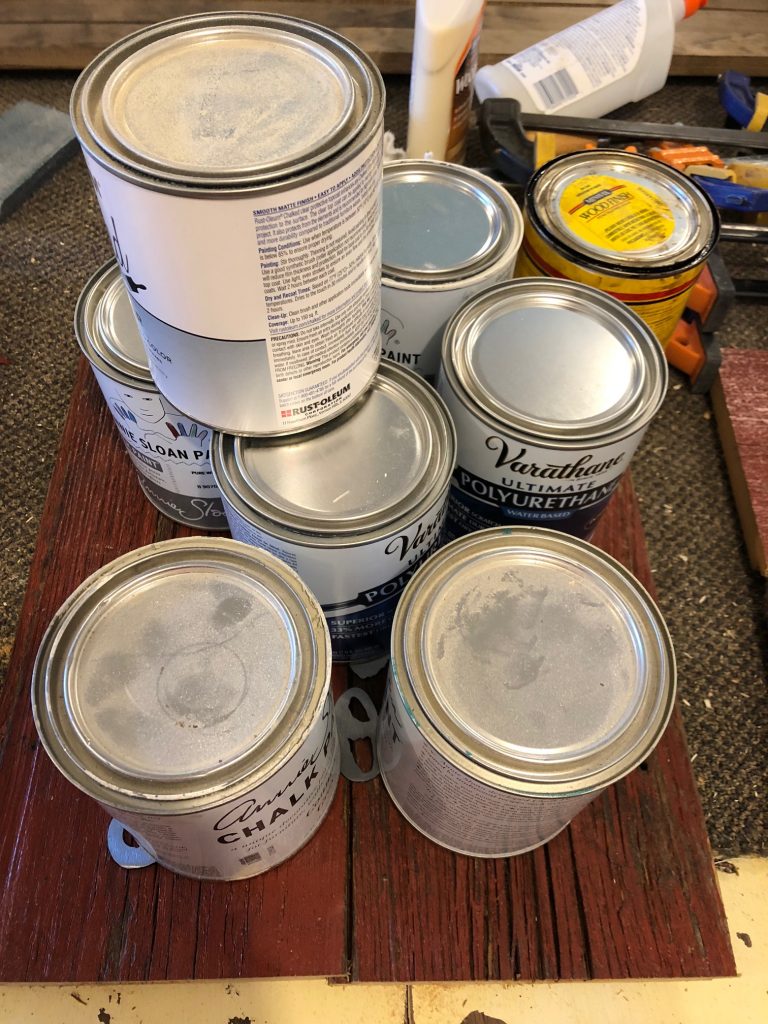
Once that was finished we sealed the barn board with matte polycrylic to make sure none of the old paint would fall or chip off. We did not test for lead paint, but instead took the necessary precautions when cutting and then sealed it for further protection. If you are working with your own barn board piece it would be a good idea to be cautious.
After sealing, all that was left was to attach the metal words to the board! We used a non-expanding super glue that works for multiple surfaces. We added it to the back of the metal and once it was placed where we wanted it, we used full cans of paint, or sealer to weight them down so the words were touching the barn board.
It is a super simple project, but makes a lovely impact in my white kitchen! I love the contrast between the barn board and the metal words and think the project turned out wonderful! We made a few of these for our store so if you don’t have access to barn board or aren’t a DIY’er just ask us if they are still available!

Thanks for following along with us this week for the ‘Deck the Home’ holiday blog hop! The other bloggers project are linked up below, so go take a gander at what they all created for their wooden project! (Click through to see them) And we will be back next week with a third holiday DIY project – this time for the porch!


This turned out beautifully! The metal words add the perfect touch and make it special. I need to order some! Pinning!
this turned out amazing. I love the fact that it feels like you got it from an antique shop but you made it instead! so great!
Love the weathered look and the metal words. Stunning!
Absolute perfection! I love rustic barn wood, too. And your metal words are so awesome for this project. Thanks for sharing.
I love the rustic look!
I am all about the rustic look this season and your sign is perfect!
I love the look of the wood!!! Nice job on the sign!
I love the metal lettering! Looks fantastic!
What a beautiful sign, I love the rustic look of the barnboard.
The red paint all rustic looking contrasts so nicely with those awesome metal words!
I love how rustic and modern it is at the same time! It’s so lovely!!!
I love this! I like the imperfections in the barnboard, and the contrast of the metal words.
Loving those metal words! They look so pretty on the chippy board!
Beautiful sign! Thanks for sharing about the metal letters too. I had no idea I could just go buy them somewhere and they seem reasonably priced. Cool craft!
This is absolutely adorable!
I love the patina of the wooden sign and the difference of the letters! It turned out so pretty!
I love this sign! The barn board is gorgeous and the letters almost look like liquid metal (if that makes sense!)