Make this easy faux pumpkin fall garland for less than $10!
The other day I was looking for something in my storage boxes in the basement and came across a couple of my fall decorations. Key word there..a COUPLE. I realized I only had a total of 4 items I could use as fall decorations. Ugh…I knew I was going to have to remedy this and started thinking about what I should buy to make our rental more “homey” for the season.
The very next day, while grabbing a couple necessities from Walmart, I saw the prettiest glittery-orange tape in the paper craft aisle! Needless to say that got put in the cart right away, and I wandered around looking for some more inspiration of what I could do with it. I found some cheap packages of foam balls and decided they would be perfect to use to make cute little pumpkins!
For your convenience in locating products we have used, this article contains affiliate links. All products are items we use and genuinely recommend. If you make a purchase after clicking we will earn a small commission at no additional cost to you! For more info go to our “Disclosures” page.
Alright, now for the tutorial:
Step 1: Is to gather all your supplies
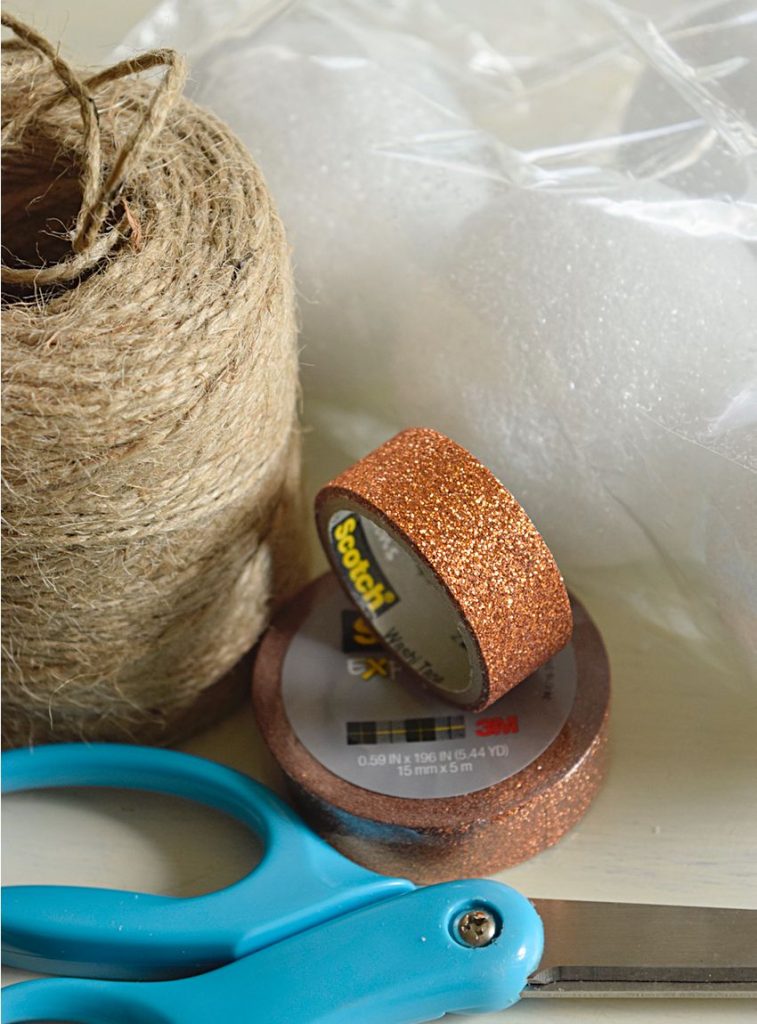
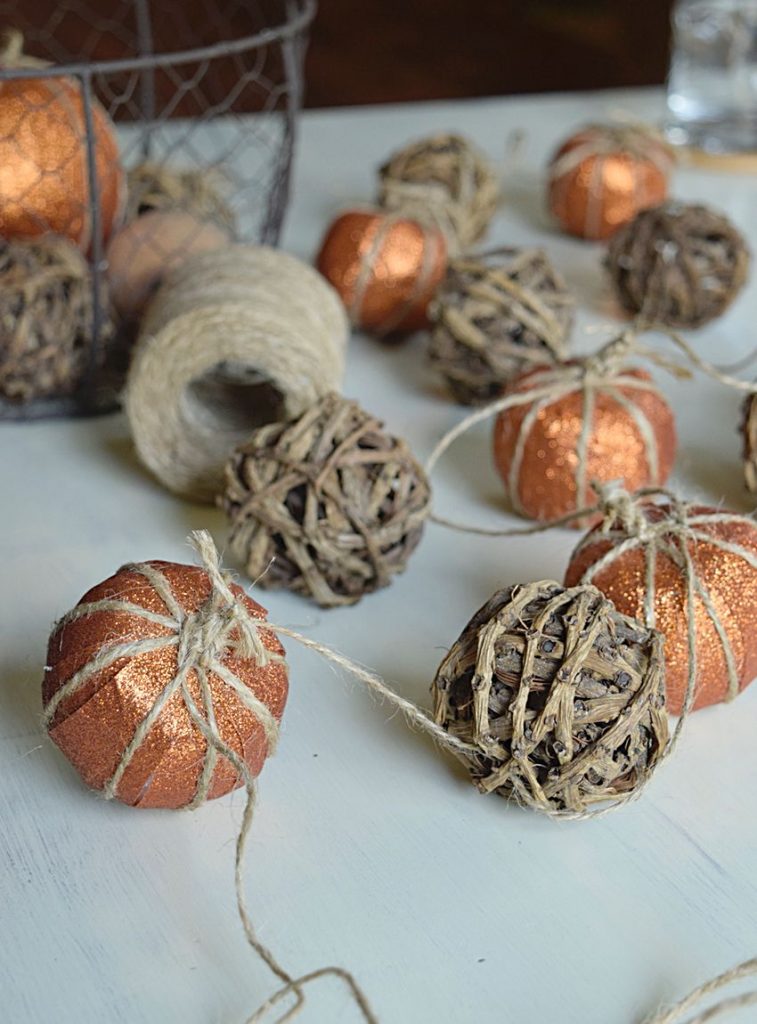
- Styrofoam Balls
- Orange Glitter Tape
- Jute String (I already had this at home)
- Scissors
That’s all!
Tip: I bought a pack of 6 foam balls which used about 1.5 rolls of tape.
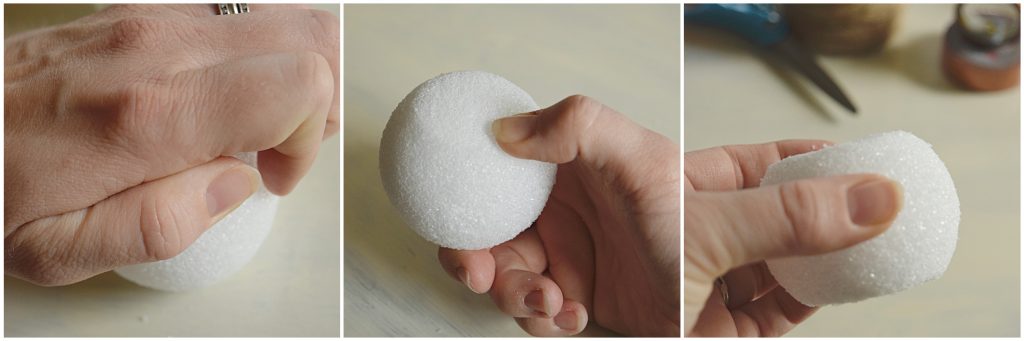
Step 2: Is kind of fun. If you have kids, this would be something they would enjoy. You take the foam balls and smash the ends! I literally pounded it against the table to get it started. (My puppy, Kirby, was really confused as to what was going on!) It only takes a couple hits before they are flattened. I then took my thumbs and squished the ends a little further around.
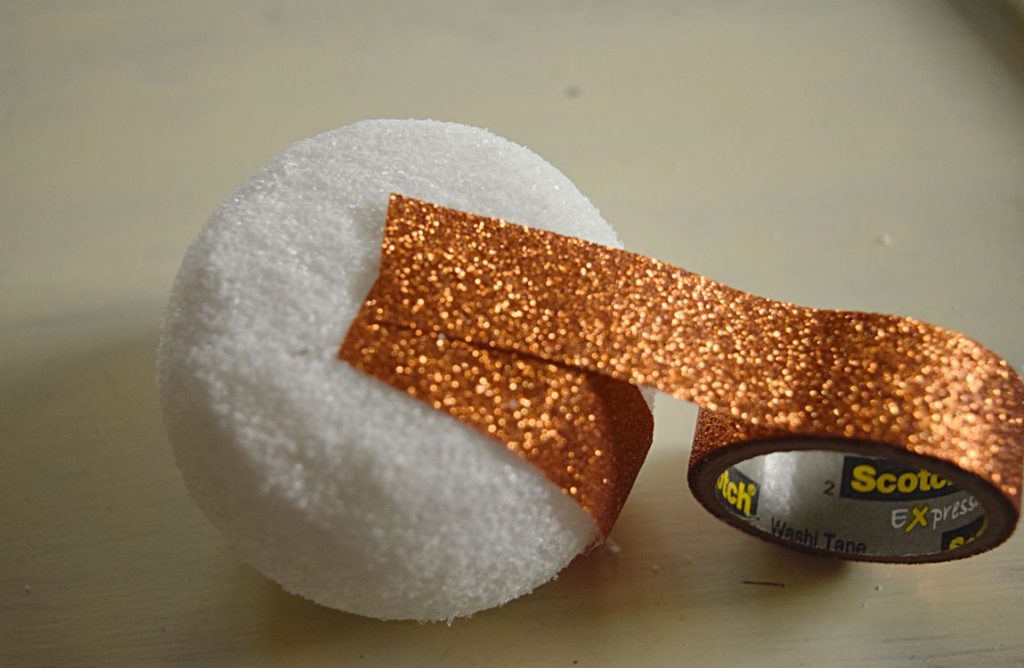
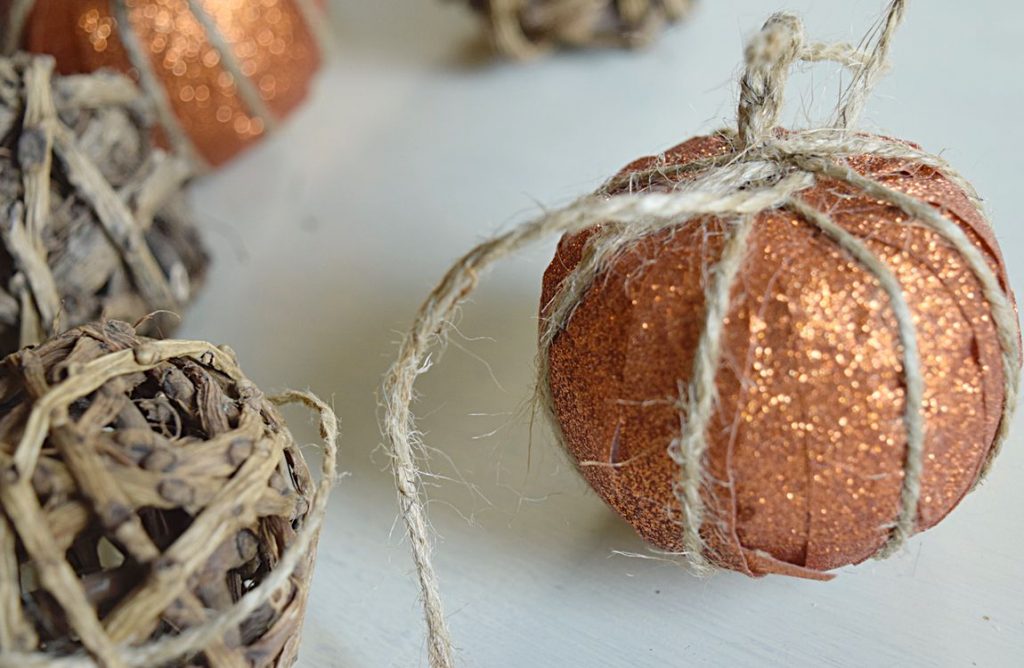
Step 3: Take your glitter tape and run it from one squished end to the other. Cut it when you get to the bottom. Continue this step all the way around. Make sure to overlap the tape edges so you don’t see the foam in between. This creates a stripe effect around the pumpkin.
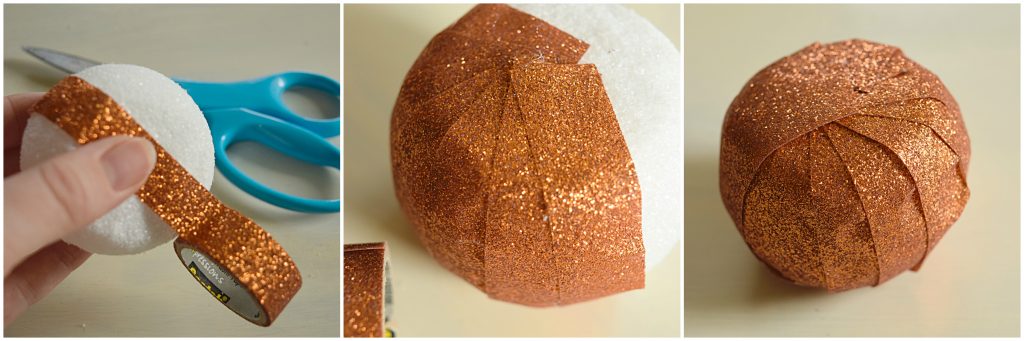
Tip: The tape doesn’t stick to the foam as well as it should, but it sticks to itself which is why overlapping the tape a bit works well.
Step 4: Take the twine, put it in the middle of one of the ends, while leaving about an inch of a tail (which you are going to use later).
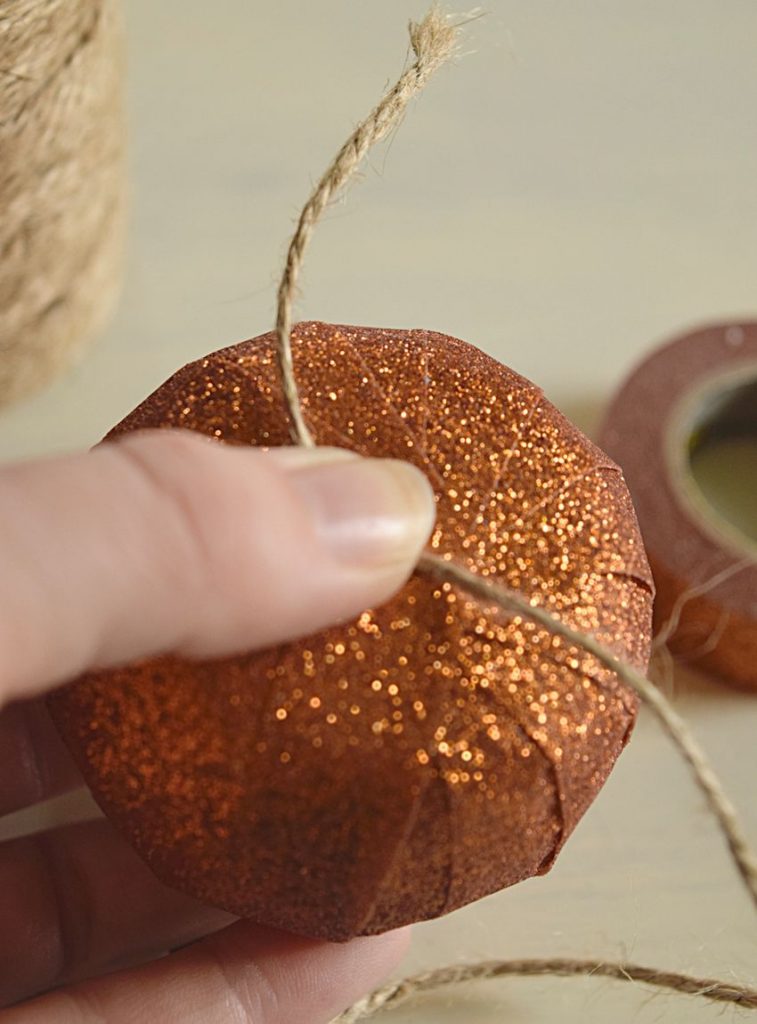
Then continue to wrap the twine around so it looks like the indents of a pumpkin.
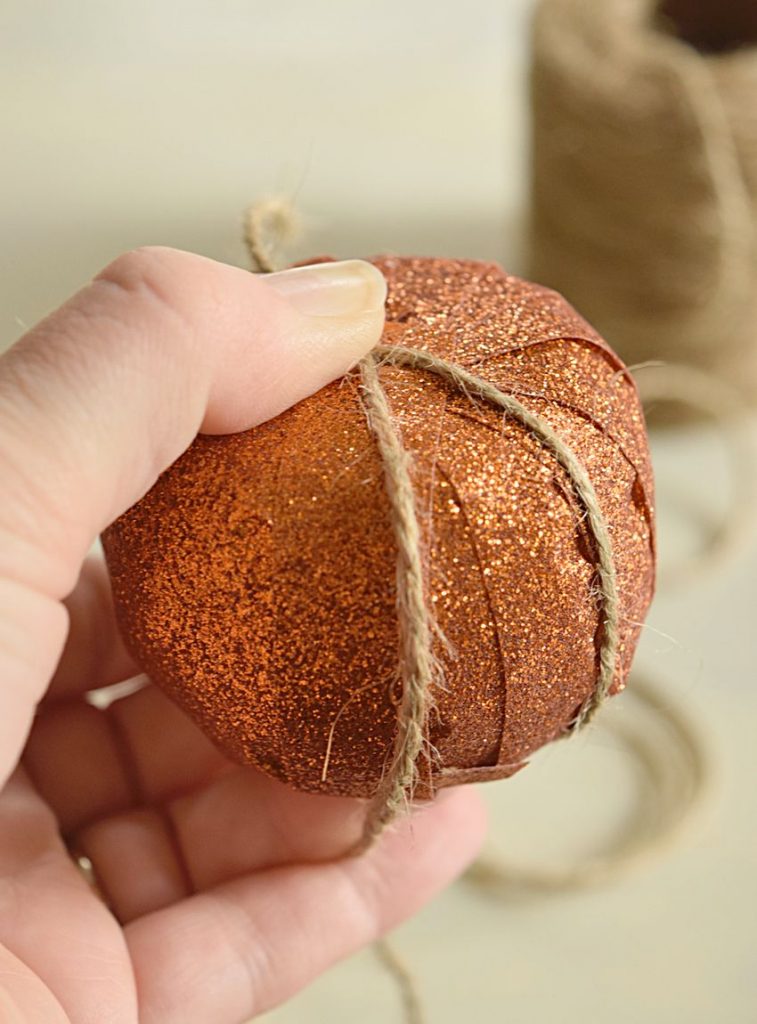
Step 5: Once the twine is wrapped around, cut it with about an inch of a tail. Take that last tail you just cut, put it under one of the wrapped strings to anchor it.
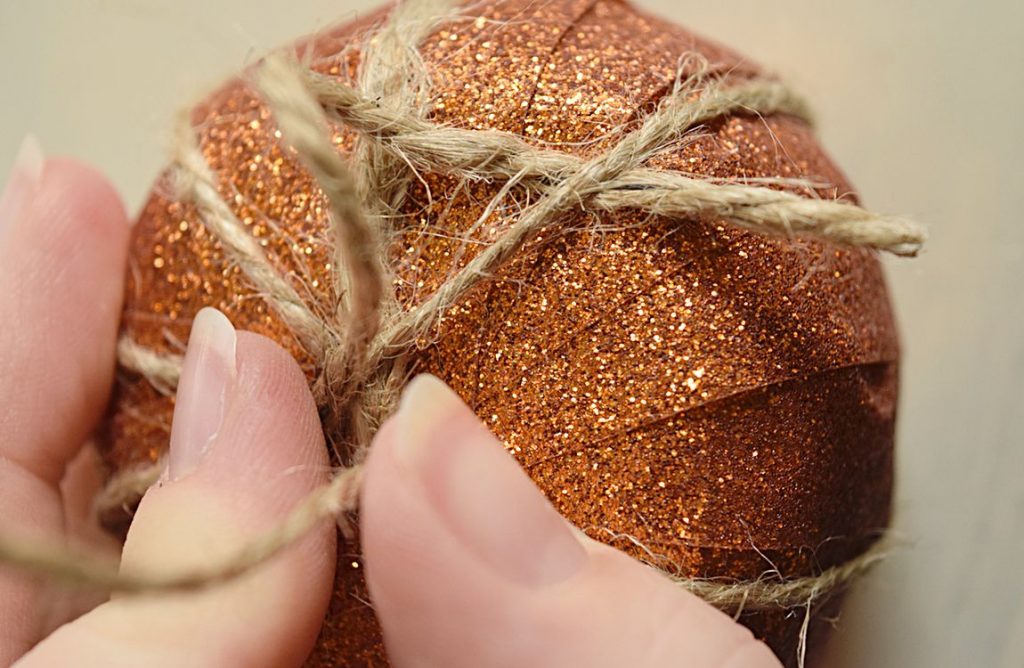
Then tie that second tail to your first tail!

I kept knotting the two tails until I couldn’t tie them anymore to construct the stem of the pumpkin!

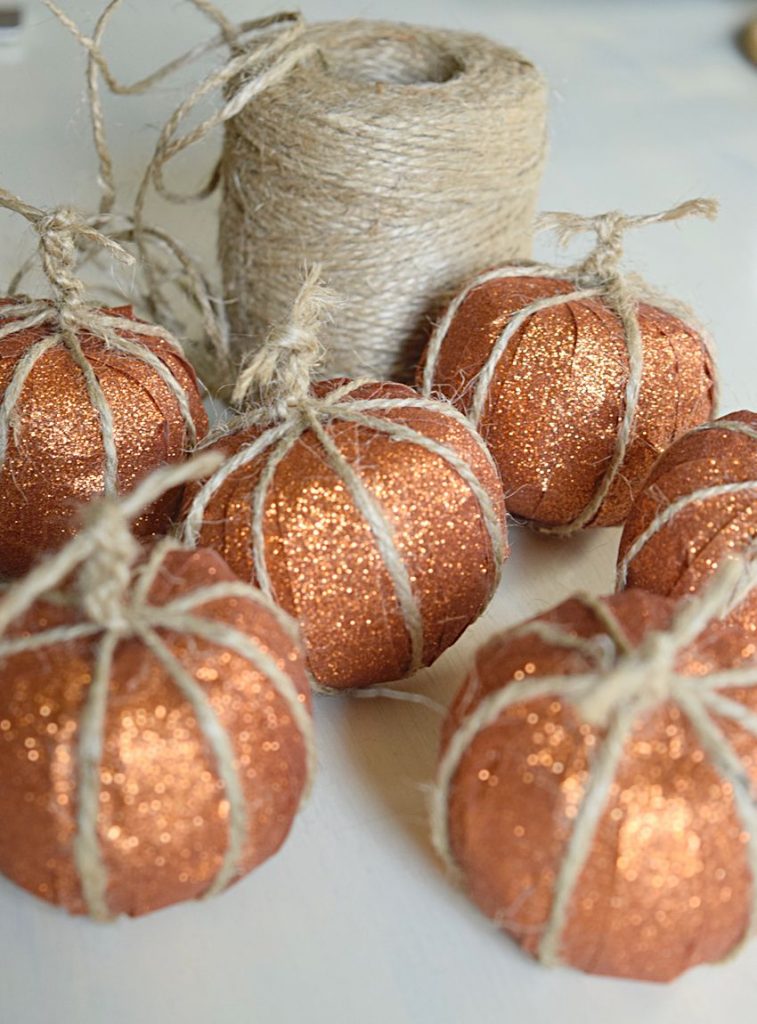
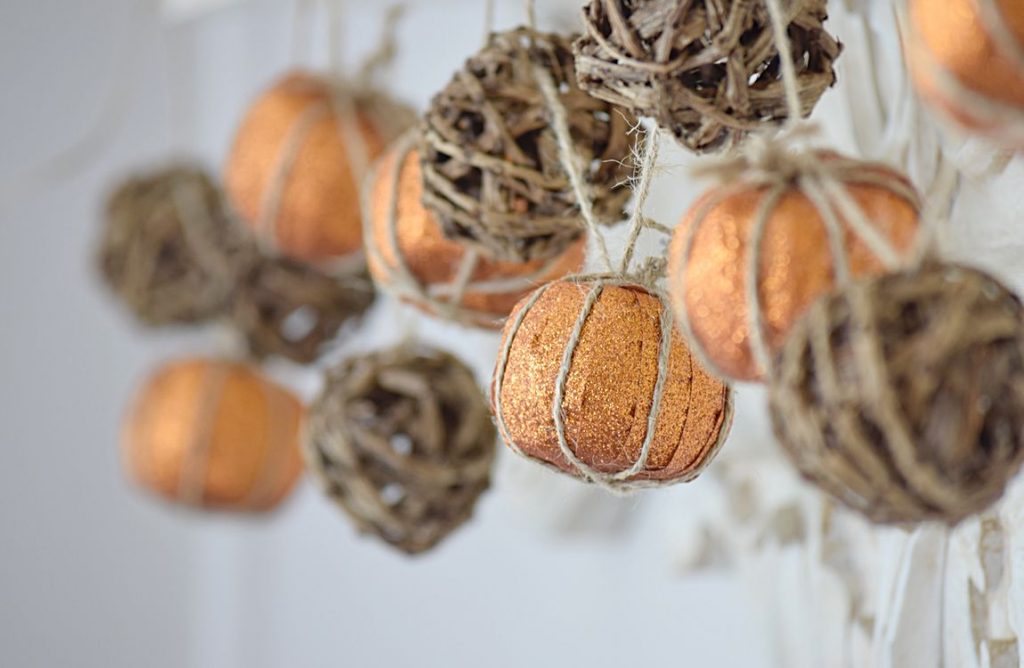
Step 6: Once your pumpkins are complete you can grab your jute string and start your garland.
(I had those natural stick fillers already at the house so I decided they would make a nice addition to the garland.) String your garland underneath the wrapped jute of your pumpkin.
Then your faux pumpkin garland is complete!
You wouldn’t have to buy any of those extra filler pieces but could just do a pumpkin garland if you wanted. Or, just using the pumpkins in a vase, tray, or basket would be very cute as well!
My garland now makes a wonderful addition to my shelf in my living room. While I could still use a few more items to make the house complete, this was a very inexpensive and easy way to craft some decor.
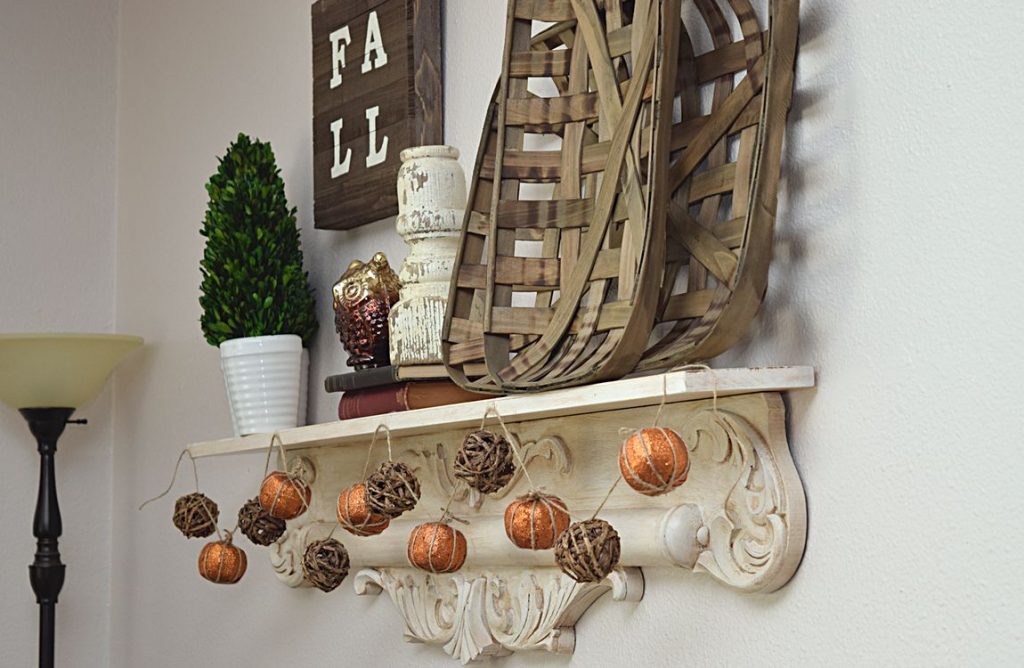
I added it to my pediment shelf, but it could really go anywhere in the home. It was light enough that clear scotch tape held it up.

One fall decoration down, many more to go!!


Linking with: Wow Us Wednesday, Remodelaholic, Snickerdodle Sunday, Dishing It and Digging It, The Creative Gallery, Thoughts of Home,


These are very cute and creative!
Thanks so much Brooke! Very very easy too!
I love how this looks Kristen! When I first looked at your pictures, I had no idea that the pumpkin was covered in glitter tape. It is the perfect blend of rustic with a little glitz.
Thank you so much for your kind words Jamie, we so appreciate it! It’s about the only orange I have in my fall decor right now, but I love that its sparkly!
It turned out so cute!! I love it 🙂
Thank you so much, Katie, for visiting and your kind words 🙂
Love this garland, can’t wait to give it a try! 🙂
So glad you liked it! It’s incredibly easy!
Love easy!! And bright! And sparkly! And did I mention EASY??
Thanks! I always appreciate seeing all the steps!
Inspire me Monday
Thanks for visiting Melinda! It is SO easy! Glad you enjoyed it!
I feel your pain… I remember when my fall bin was like that too. Give it a few years, you’ll soon be overflowing with creative fall decor to style & stage everywhere! #blogginglife Love your creativity! So cute.. had to pin & share!
Haha! I am getting a good start on my fall decor this year with all my DIY projects! Thanks for visiting and for sharing, Wendi!
Great tutorial! I love how light the garland is because of the crafty use of styrofoam and glitter tape. Adorable! I featured you on A Little Bird Told Me this week.
Thanks so much for featuring us Sandy! It was such an easy project, so glad you liked it!
Your fall garland is so adorable and you do a great tutorial. Thank you for sharing with us at Snickerdoodle.
Thank you so much Sharon! We are so glad we could come and link up with your party!
Oh my, these pumpkins are so cute!! What a creative way to make them from foam balls and tape!! They look great as garland.
Thank you so much Keri! We are so glad you liked our garland! Thank you for visiting!
How creative! Your pumpkin garland looks wonderful. Thanks for sharing at Snickerdoodle. Pinned.
Thank you so much Beverly! Thanks for visiting and for sharing!!
I love this pumpkin garland and it looks easy to make! I have chosen this project as my feature at Totally Terrific Tuesday. Thanks for linking up with us.
Oh thank you so much for the feature Sherry! So glad you loved our fun fall project!
Absoutely love simple, cheap, and chic DIY projects – this one hits all three! My daughter would love that tape – I’m going to have to check out my local store and see if I can dig some up.
Yay! Thanks so much Candace! so glad you loved it!
Oh my goodness! This is the cutest garland, I need lots of little sparkly pumpkins 🙂
Haha! Thanks so much Kati!
What a great idea, so festive! Thanks for sharing at the To Grandma’s house we go link party today! Pinned!
Thank you 🙂 Thanks for being such a wonderful hostess!
I’m really loving the glitter mixed with the jute string and twiggy ball things. They contrast is lovely.
Thank you Julie 🙂
I love this, it looks so adorable!!
Thank you 🙂
I absolutely adore this pumpkin garland. Using washi tape is so creative! Thanks for sharing it at The Crafty Corner link party, and I will be featuring it at this week’s upcoming party (Wednesday 6am EST). I hope to see you there again!
Oh wonderful! Thank you so much for featuring our garland! We appreciate it!
Pumpkins full of Bling! Too cute … thanks for the tutorial.
Haha! Thank you! So sparkly!
Creative, cost-effective and cute…meets the 3 Cs… cannot go wrong with that. 🙂 Thank you for sharing at Monday Social. Hope to see you again and hope you include us in your list of sites you join. 🙂 We love seeing all your creativity.
Judith
Thank you so much Judith! Your party is definitely one we will continue to frequent 🙂
Saw this on the Creative Corner link party. I would have never thought of that. Genius! And your nails looked so nice too!
Haha! Thank you Cindy! It just came to me!
Your garland turned out great – at first glance I had no idea you used glitter tape, but what a great idea! Thanks for linking up with Merry Monday this week. I’ll be featuring your garland at our upcoming party. I hope you’ll stop by and link up with us again!
Hi Kristen, I wanted to let you know that we loved your DIY Pumpkin Garland when you linked up at Home Matters so much that we are featuring it today. I hope you can stop by to check it out when you get a chance. https://ourcraftymom.com/home-matters-linky-party-151/
I love the pairing of the glitter paper and the wood. So darling! Thanks for linking up to the party!